Category: Instructions

magic chef microwave operating instructions

Safety Instructions for Magic Chef Microwave

Always read the manual before using your Magic Chef microwave to ensure safe operation. Never operate the oven with the door open to avoid exposure to microwave energy. Follow all safety precautions to prevent accidents and ensure proper functionality. Safety first!

1.1 General Safety Precautions

Read all instructions carefully before using your Magic Chef microwave to ensure safe and proper operation. Never attempt to operate the oven with the door open, as this can lead to exposure to microwave energy. Keep the microwave on a stable, flat surface to prevent accidents. Avoid using metal utensils or aluminum foil, as they can cause sparks or fires. Only use microwave-safe containers and dishes to prevent breakage or chemical release. Do not leave cooking unattended, especially when heating liquids, as they can boil over suddenly. Keep children away from the microwave while it is in operation. Ensure all food and liquids are placed in appropriate containers before cooking. Follow the manufacturer’s guidelines for power levels and cooking times to avoid overheating or burning food. Always check for any damage to the microwave or its components before use. If unsure about any operation, consult the user manual or contact customer support.

1.2 Avoiding Exposure to Excessive Microwave Energy

To prevent exposure to excessive microwave energy, always ensure the microwave door is closed properly during operation. Never attempt to cook with the door open or tamper with the door seals, as this can lead to microwave energy leakage. Avoid standing directly in front of the microwave while it is running, as this increases the risk of exposure. Do not use damaged or warped dishes, as they may cause uneven heating and potential energy leakage. Keep the microwave oven away from direct contact with water or moisture, as this can interfere with its operation. Regularly inspect the door seals and hinges for wear and tear, and replace them if necessary. If you notice any unusual sparks or arcing during cooking, stop the microwave immediately and contact a qualified technician. Always follow the manufacturer’s guidelines to minimize the risk of exposure to microwave energy.

1.3 Fire and Shock Prevention

To prevent fires and shocks when using your Magic Chef microwave, never leave cooking food unattended. Ensure all food and liquids are placed in microwave-safe containers, as metal utensils or foil can cause sparks and ignite fires. Keep the microwave interior clean, as food splatters can catch fire if heated again. Avoid overheating oils or fats, as they can ignite. Do not operate the microwave near flammable materials, such as curtains or towels. If smoke appears, turn off the microwave immediately and unplug it. Always unplug the appliance before cleaning or performing maintenance to prevent electrical shocks. Never use damaged cords or plugs, as they can cause electrical hazards. In case of a malfunction, disconnect power and consult a professional for repairs. Follow these guidelines to ensure safe operation and prevent potential fire or shock risks.

Initial Setup and Installation

Unpack your Magic Chef microwave carefully and place it on a stable, flat surface. Ensure proper ventilation and keep it away from flammable materials. Register your product for warranty coverage and refer to the manual for installation guidelines. Proper setup ensures safe and efficient operation.

2.1 Unpacking and Placement Guidelines

When unpacking your Magic Chef microwave, carefully remove all packaging materials and ensure no damage occurred during shipping. Place the microwave on a stable, flat surface, such as a countertop, ensuring proper ventilation. Avoid areas near flammable materials or water sources. Position the unit at least 3 inches away from any adjacent surfaces to allow proper air circulation. Do not install the microwave near direct sunlight or extreme temperature fluctuations. Ensure the turntable and roller guide are correctly assembled before use. For optimal performance, keep the area around the microwave clean and clear of obstructions. Follow the installation guidelines provided in the manual to ensure safe and efficient operation. Proper placement is crucial for both functionality and safety.

2.2 Product Registration

Registering your Magic Chef microwave is an essential step to ensure warranty coverage and access to customer support. To register, visit the official Magic Chef website at www.mcappliance.com and fill out the product registration form. Provide the required details, including your contact information and the microwave’s model number, which can be found on the unit or in the user manual. Registration helps protect your investment and ensures you receive updates, maintenance tips, and support. Keep a copy of your registration confirmation for future reference. This process is quick and ensures you benefit from the full range of services offered by Magic Chef. Registration is a simple step to safeguard your product and enhance your user experience.

2.3 Understanding the Control Panel

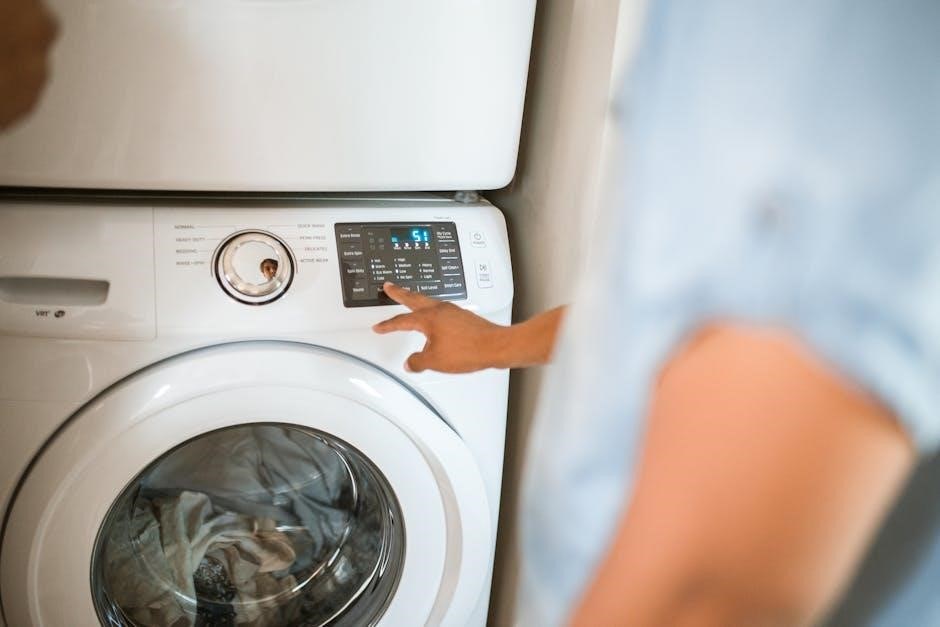
The Magic Chef microwave’s control panel is designed for intuitive operation. It features a digital display for easy navigation and buttons for selecting cooking modes, power levels, and time settings. The Start and Cancel buttons allow you to control cooking functions, while the Turntable button ensures even cooking. Use the Power Level button to adjust energy output, and the Cook Time and Defrost buttons for specific tasks. The Sensor Cooking option automatically adjusts cooking time based on food moisture. Familiarize yourself with these controls to maximize your microwave’s functionality. Always refer to your user manual for model-specific details, as features may vary. Understanding the control panel ensures safe and efficient use of your Magic Chef microwave.

Operating the Magic Chef Microwave

Place food on the turntable, set cooking time and power level, press Start. Always follow instructions for safe and efficient cooking with your Magic Chef microwave.

3.1 Basic Cooking Instructions

For basic cooking, place food on the turntable and set the cooking time and power level using the control panel. Press Start to begin. Always ensure the door is closed properly before operation. Use microwave-safe containers and cover food to avoid splatters. Follow the recommended cooking times and power levels provided in the manual for specific foods. Defrosting and reheating require selecting the appropriate mode to ensure even heating. Check food periodically to avoid overcooking. After cooking, allow food to stand for a moment before serving. Clean any splatters immediately to maintain hygiene and prevent odor buildup. Always refer to the user manual for specific guidelines tailored to your Magic Chef microwave model.

3.2 Power Level Adjustments

The Magic Chef microwave offers 10 adjustable power levels, allowing you to customize cooking based on food type and desired results. To adjust the power level, press the Power Level button on the control panel and select the appropriate setting using the number pads. Lower power levels are ideal for defrosting and reheating, while higher levels are better for cooking. Always refer to the user manual for recommended power levels for specific foods, such as vegetables, meats, or frozen meals. Adjusting the power level ensures even cooking and prevents overheating or undercooking. Experiment with different settings to achieve the best results for your dishes. Proper power level adjustment enhances cooking efficiency and food quality, making your Magic Chef microwave a versatile kitchen tool.

3.3 Convection Cooking Guidelines

For optimal convection cooking results with your Magic Chef microwave, ensure the turntable is in place to allow proper air circulation. Preheat the oven if required for specific recipes. Use bakeware suitable for high temperatures and avoid metal utensils. Set the convection mode by pressing the Convection button and adjust the temperature and cooking time using the control panel. Always follow recipe guidelines for temperature and time adjustments. Food should be placed in a single layer for even cooking. Stir or flip food midway through cooking for consistent results. Avoid overcrowding the oven to ensure air circulates evenly. Refer to the user manual for specific convection cooking settings and guidelines to achieve the best results. Regularly clean the interior to maintain performance and prevent food residue buildup.

3.4 Defrosting and Reheating Instructions

To defrost food safely and evenly using your Magic Chef microwave, place the food in a microwave-safe dish and cover it to prevent splattering. Use the Defrost function, entering the weight or time as needed. Stir or flip food midway for consistent thawing. For reheating, set the microwave to 30-50% power to avoid overheating. Use a microwave-safe container and cover with a lid or plastic wrap to retain moisture. Heat in short intervals, checking and stirring until the desired temperature is reached. Allow food to stand for 1-2 minutes after reheating to ensure even heat distribution. Always use microwave-safe utensils and avoid overheating, especially for liquids. Refer to the user manual for specific defrosting and reheating times based on food type and quantity.

3.5 Using the Turntable

The turntable in your Magic Chef microwave is designed to ensure even cooking and defrosting by rotating food during operation. Always place the glass tray and roller guide in the microwave before cooking. Ensure the turntable is clean and dry to avoid slipping. For optimal performance, check that the roller guide is securely attached to the turntable. Place food in a microwave-safe dish on the center of the turntable to prevent uneven cooking. Avoid overloading the turntable, as this may cause imbalance. After use, clean the turntable and roller guide with mild soap and water to maintain hygiene. If the turntable does not rotate, check for blockages or improper placement. Refer to your user manual for specific guidelines on caring for and replacing the turntable and roller guide if necessary.

Maintenance and Cleaning

Regularly clean the microwave interior with mild soap and water to prevent food residue buildup. Wipe the exterior with a damp cloth and dry thoroughly to avoid moisture spots. Keep it clean!

4.1 Cleaning the Interior and Exterior

To maintain your Magic Chef microwave’s performance and appearance, clean it regularly. For the interior, use a mild soap solution or a microwave-safe cleaning product. Avoid abrasive materials that could scratch surfaces. Wipe down the interior walls, ceiling, and floor, paying attention to food splatters. For tough stains, heat a microwave-safe bowl of water and lemon juice for 2-3 minutes to create steam, then wipe clean. The exterior can be cleaned with a damp cloth; avoid harsh chemicals or scrubbers to prevent damage. Regular cleaning prevents odor buildup and ensures efficient cooking. Always unplug the microwave before cleaning to avoid accidents. For the turntable and roller guide, wash them in warm soapy water and dry thoroughly before reinstalling. Consistent cleaning keeps your microwave hygienic and functional.

4.2 Maintaining the Turntable and Roller Guide

The turntable and roller guide in your Magic Chef microwave are essential for even cooking and smooth operation. To maintain them, wash the turntable and roller guide regularly with warm, soapy water. Avoid using abrasive cleaners or scrubbers, as they may damage the surfaces. Dry thoroughly before reinstalling to prevent water spots. Ensure the turntable is properly seated and the roller guide is aligned to avoid uneven rotation. If the turntable becomes chipped or cracked, replace it immediately to prevent accidents. Regular maintenance prevents food residue buildup and ensures smooth functionality. Inspect the roller guide periodically for wear and tear; replace it if necessary. Proper care of these components ensures optimal performance and longevity of your microwave.

4.3 Troubleshooting Common Issues

Common issues with your Magic Chef microwave can often be resolved with simple troubleshooting. If the turntable does not rotate, ensure it is properly seated and clean. For uneven cooking, check that food is placed correctly and the oven is not overcrowded. If the microwave does not start, verify that the door is closed securely and the outlet is functioning. If there is no heat, confirm that the power level is set correctly and the cooking time is adequate. For unusual noises, inspect for obstructions or misaligned parts. If issues persist, consult the user manual or contact customer support. Regular cleaning and maintenance can prevent many of these problems. Always unplug the microwave before attempting repairs. Refer to the troubleshooting section in your manual for detailed guidance.

Advanced Features and Settings

Explore advanced features like sensor cooking, multi-stage options, and special modes for precise results. These settings enhance efficiency and versatility, ensuring optimal performance for various cooking needs. Advanced features make cooking easier!

5.1 Sensor Cooking Functionality

The Magic Chef microwave features advanced sensor cooking technology designed to automatically adjust cooking time and power levels. Sensors detect moisture and humidity levels in food to ensure optimal results. This functionality eliminates guesswork, preventing overcooking or undercooking. It is particularly useful for delicate dishes like fish, vegetables, and reheating leftovers. The sensors continuously monitor cooking progress, adjusting settings for even heating. Sensor cooking ensures consistent, perfectly cooked meals every time. This feature is especially handy for busy users seeking convenience without compromising quality. By leveraging smart technology, the Magic Chef microwave simplifies cooking while maintaining flavor and texture. Let the sensors do the work for you!

5.2 Multi-Stage Cooking Options

The Magic Chef microwave offers multi-stage cooking, allowing you to preset multiple cooking stages in a single cycle. This feature is ideal for complex dishes requiring different power levels or cooking times. Users can program up to three stages, such as defrosting, cooking, and keeping food warm. The microwave automatically adjusts power levels and duration for each stage, ensuring precise cooking results. Multi-stage cooking is perfect for dishes like roasts or casseroles that need initial high power for browning and lower power for even heating. Sensors monitor progress, adjusting settings to prevent overcooking. This advanced feature simplifies meal preparation, allowing for hands-free cooking. Multi-stage cooking ensures your dishes are cooked evenly and to perfection every time.

5.4 Special Cooking Modes

The Magic Chef microwave features special cooking modes designed to enhance your culinary experience. These modes include sensor cooking, which automatically adjusts cooking times based on food moisture levels, and multi-stage cooking, allowing you to preset different power levels and times for complex dishes. Additional modes like defrosting and reheating ensure precise temperature control, preventing overcooking or undercooking. The microwave also offers convection cooking for crispy results and even browning. For added convenience, special preset options are available for common foods like popcorn, frozen vegetables, and baked potatoes; These modes simplify cooking by eliminating guesswork, ensuring perfectly cooked meals every time. Always refer to the user manual for detailed instructions on activating and utilizing these special cooking modes effectively.

Additional Information

For further assistance, contact Magic Chef customer support. Warranty details are provided in the manual. Tips for energy efficiency and eco-friendly usage are also included for optimal performance.

6.1 Customer Support and Warranty

For any inquiries or issues with your Magic Chef microwave, contact our customer support team via phone, email, or through the official website. Product registration is required to activate your warranty, ensuring coverage for repairs and replacements. The warranty period varies by product and region, so refer to your manual for specific details. Our support team is available to assist with troubleshooting, maintenance, and general queries. Visit the Magic Chef website for comprehensive resources, including FAQs, user manuals, and contact information. Keep your proof of purchase handy for warranty claims. We are committed to providing reliable service and support to enhance your experience with Magic Chef appliances.

6.2 Referencing the User Manual

For optimal use of your Magic Chef microwave, it is essential to thoroughly read and reference the user manual. This guide provides detailed instructions on safety precautions, operational procedures, and maintenance tips. The manual is divided into sections such as safety instructions, installation guidelines, and troubleshooting to ensure easy navigation. Always keep the manual handy for quick reference when needed. If you have misplaced your physical copy, visit the Magic Chef website to download a digital version. The manual also includes diagrams and illustrations to help you understand complex features. By following the instructions outlined, you can ensure safe and efficient operation of your microwave. Regularly reviewing the manual can also help you discover new features and optimize your cooking experience.

6.3 Energy Efficiency Tips

To maximize energy efficiency while using your Magic Chef microwave, follow these practical tips. Always defrost food before cooking to reduce cooking time and energy consumption. Use microwave-safe containers of appropriate sizes to avoid unnecessary energy usage. Opt for shorter cooking times and lower power levels when possible, as microwaves are generally more energy-efficient than conventional ovens. Cover containers during cooking to retain heat and reduce cooking duration. Regularly clean the microwave interior to ensure optimal performance and avoid prolonged cooking times due to food residue buildup. Additionally, utilize the defrost function for thawing instead of leaving food at room temperature. By implementing these strategies, you can minimize energy usage while maintaining effective cooking results. Refer to your user manual for specific guidelines tailored to your model for even greater efficiency.

instruction manual for nostalgia popcorn maker

The Nostalgia Popcorn Maker offers a classic, easy-to-use design for homemade popcorn. It uses hot air for a healthier option, perfect for family gatherings or movie nights.

1.1 Overview of the Nostalgia Popcorn Maker

The Nostalgia Popcorn Maker is a compact, user-friendly appliance designed for home use. It utilizes hot air to pop kernels without oil, making it a healthier option. With a simple one-button operation, it’s easy to use for all ages. The machine features a large capacity, producing up to 2.3 liters of popcorn in minutes. Its retro design adds a nostalgic touch to any kitchen. Ideal for family gatherings, movie nights, or parties, it includes a manual with recipes for various flavors. The device is lightweight and portable, making it perfect for indoor and outdoor events. Its durability and ease of cleaning ensure long-term performance. This popcorn maker is a versatile and convenient addition to any home.

1.2 Benefits of Using the Nostalgia Popcorn Maker

The Nostalgia Popcorn Maker offers numerous benefits, making it a fantastic addition to any home. It provides a healthy alternative to traditional popcorn methods by using hot air instead of oil, reducing calories and fat. The machine is incredibly easy to operate, with a simple one-button control that makes it accessible for all ages. Its large capacity allows for up to 2.3 liters of popcorn, perfect for family gatherings or parties. The compact and retro design adds a stylish touch to any kitchen. Additionally, the included manual provides recipes for various flavors, enabling customization. The device is also lightweight and portable, making it ideal for indoor and outdoor events. Overall, it’s a fun, convenient, and cost-effective way to enjoy homemade popcorn.

Safety Precautions

Always unplug the machine when not in use and keep it out of children’s reach. Avoid overheating and never touch hot surfaces during operation.

2.1 Important Safety Tips

Always read the manual before first use; Ensure the popcorn maker is placed on a stable, heat-resistant surface. Keep children away during operation. Avoid touching hot surfaces, and never leave the machine unattended while in use. Plug the device into a grounded outlet to prevent electrical hazards. If you notice any malfunction, stop use immediately. Regularly clean the machine to prevent dust buildup, which can cause overheating. Store the popcorn maker in a dry place when not in use. Follow these tips to ensure safe and enjoyable use of your Nostalgia Popcorn Maker.

2.2 Precautions for Handling the Popcorn Maker

Handle the popcorn maker with care to avoid accidents. Always use oven mitts or tongs when touching hot surfaces. Never insert metal objects or hands into the popping chamber while in operation. Avoid exposing the machine to water or moisture, as this can cause electrical issues. Keep the cord away from hot surfaces and ensure it is securely plugged into a grounded outlet. When moving the machine, lift it by the handles to prevent damage. After use, allow the machine to cool before cleaning. Never submerge the entire unit in water; instead, wipe it with a damp cloth. Proper handling ensures longevity and safe operation of your Nostalgia Popcorn Maker.

2.3 Emergency Procedures

In case of an emergency, unplug the popcorn maker immediately to prevent further issues. If smoke is detected, stop the machine and allow it to cool. Never use water to extinguish electrical fires; instead, use a dry chemical extinguisher if necessary. If the machine overheats, turn it off and let it cool before investigating. Should a fire occur, evacuate the area and contact emergency services. Always ensure the machine is on a stable, heat-resistant surface to minimize fire risks. Regular maintenance and following safety guidelines can help prevent emergencies. Keep children away during operation and never leave the machine unattended while in use.

Parts and Components

The Nostalgia Popcorn Maker includes a popping chamber, heating element, fan, and control panel. Additional accessories may include a measuring cup and butter melter for convenience.

3;1 Main Components of the Nostalgia Popcorn Maker

The Nostalgia Popcorn Maker features a durable popping chamber, a powerful heating element, and a high-speed fan for even cooking. Its compact design includes a clear lid for monitoring popcorn progress. The unit has a simple control panel with a start/stop button, ensuring easy operation. Additionally, it comes with a measuring cup for portion control and a butter melter tray for adding flavor. These components work together to produce up to 2.3 liters of popcorn quickly and efficiently. The machine’s parts are designed for longevity and ease of use, making it ideal for home entertainment and family gatherings.

3.2 Optional Accessories

The Nostalgia Popcorn Maker can be enhanced with optional accessories to improve functionality and customization. A popcorn scoop is ideal for serving, while flavor shakers allow for seasoning variety. Additional accessories include a popcorn cart or stand for portability and a recipe book with creative popcorn ideas. These extras can elevate your popcorn-making experience, offering convenience and versatility for different settings. Whether for home use or small gatherings, these accessories complement the machine’s performance and enhance user satisfaction. They are designed to work seamlessly with the Nostalgia Popcorn Maker, ensuring a enjoyable and customizable snacking experience.

Assembly and Setup

The Nostalgia Popcorn Maker requires minimal assembly. Simply align the main components, plug in the machine, and ensure all parts are securely fitted for safe operation.

4.1 Step-by-Step Assembly Instructions

Start by unpacking the Nostalgia Popcorn Maker and identifying all components, including the main unit, popping chamber, and butter melter. Place the machine on a stable surface. Next, attach the popping chamber to the main unit by aligning the hooks and securing it with the provided clips. Ensure the chamber is tightly fitted to prevent any gaps. Plug in the power cord, but avoid turning it on until assembly is complete. For models with a butter melter, attach it to the side of the popping chamber using the screw provided. Double-check all connections for stability. Finally, refer to the manual for specific alignment adjustments to ensure proper operation. This simple setup ensures safe and efficient popcorn making for any occasion.

4.2 Aligning and Balancing the Machine

Proper alignment and balancing are crucial for optimal performance of the Nostalgia Popcorn Maker. Begin by placing the machine on a flat, stable surface. Use a spirit level to ensure the base is even. If necessary, adjust the feet to achieve balance. Misalignment can lead to uneven popcorn cooking or machine wobbling. Once aligned, secure the unit firmly to prevent movement during operation. Proper balancing ensures consistent popping results and reduces the risk of mechanical stress. Always refer to the manual for specific alignment recommendations tailored to your model. This step ensures smooth functionality and extends the lifespan of your popcorn maker.

Operating the Popcorn Maker

The Nostalgia Popcorn Maker operates with ease, using a simple one-button control. It utilizes hot air to pop kernels, offering a healthier, oil-free snacking option for any occasion.

5.1 Preparing the Machine for Use

To prepare the Nostalgia Popcorn Maker, ensure all components are securely assembled. Plug in the machine and allow it to preheat for a few minutes. Place a bowl under the popping chute to catch the popcorn. Add 1-2 tablespoons of popcorn kernels to the popping chamber, depending on desired quantity. Do not exceed the recommended capacity. Close the lid firmly to ensure even popping. Make sure the machine is placed on a stable, heat-resistant surface. Keep children away during operation. The machine is ready to use once it begins producing a steady flow of popcorn. Always follow the manual’s guidelines for optimal performance.

5.2 The Cooking Process

Once the machine is prepared, turn it on and allow the heating element to warm up. You will hear popping sounds as the kernels explode into fluffy popcorn. The hot air circulation ensures even cooking without oil, making it a healthier option. The popping chute directs the popcorn into your bowl. For optimal results, use 1-2 tablespoons of kernels, depending on your preference. The machine will continue to pop until all kernels are cooked. If popping slows significantly, turn off the machine. Avoid overfilling to prevent clogging. The process typically takes 2-4 minutes, depending on the quantity. Always monitor the process to ensure even cooking and avoid burning. Once done, season your popcorn while it’s warm for the best flavor. Regularly cleaning the chute and chamber after use is recommended to maintain performance. This method ensures a delicious, oil-free snack every time.

5.3 Monitoring the Popcorn

Monitoring the popcorn is essential to ensure perfect cooking. Listen to the popping sounds to gauge progress. As popping slows, kernels near the end will pop less frequently. Use the clear chute to visually inspect the popcorn flow. Once pops are 2-3 seconds apart, turn off the machine to prevent burning. Avoid overfilling the kernel container, as this can disrupt airflow and lead to uneven cooking. Keep the bowl nearby to catch the freshly popped kernels. Never leave the machine unattended during operation. Proper monitoring ensures fluffy, evenly cooked popcorn every time. This step is crucial for achieving the best results and maintaining the machine’s efficiency.

5.4 Shutdown and Cooling

After the popping cycle is complete, turn off the machine and unplug it from the power source. Allow the unit to cool down completely before cleaning or storing. Never attempt to clean the popcorn maker while it is still hot, as this can cause burns or damage. Once cooled, wipe down the exterior with a soft cloth and clean the bowl and chute with mild soap and warm water. Regularly cleaning the machine after use prevents residue buildup and ensures optimal performance. Proper shutdown and cooling procedures help maintain the longevity of the Nostalgia Popcorn Maker and ensure safe operation for future use.

Cleaning and Maintenance

Regular cleaning ensures optimal performance. Wipe the exterior with a damp cloth and clean the bowl and chute with mild soap and warm water after each use.

6.1 Routine Cleaning

Regular cleaning is essential to maintain the performance and longevity of your Nostalgia Popcorn Maker. Start by unplugging the machine and allowing it to cool completely before cleaning. Use a soft, damp cloth to wipe down the exterior, removing any dust or splatters. For the popcorn chute and bowl, wash them with mild soap and warm water, ensuring no food residue remains. Avoid using abrasive cleaners or scrubbers, as they may damage the surfaces. Dry all parts thoroughly with a clean towel to prevent moisture buildup. For tough stains, soak the components in warm soapy water for a few minutes before rinsing. Regular cleaning prevents old popcorn odors and maintains hygiene. Always refer to the manual for specific cleaning instructions.

  • Use a soft, damp cloth for the exterior.
  • Wash removable parts with mild soap and water.
  • Avoid abrasive cleaners to prevent damage.
  • Dry thoroughly to prevent moisture buildup.

6.2 Deep Cleaning and Sanitizing

For a thorough deep clean and sanitizing of your Nostalgia Popcorn Maker, start by unplugging and allowing it to cool. Mix equal parts water and white vinegar in the popping chamber, letting it soak for 30 minutes to break down residue. Use a soft-bristle brush to scrub stubborn stains and kernels trapped in small crevices. Rinse all parts with warm water to remove vinegar traces, then dry with a clean towel or air dry to prevent water spots. For tougher sanitizing, soak components in a mild dish soap solution before rinsing. Avoid harsh chemicals to prevent damage. Regular deep cleaning ensures fresh-tasting popcorn and optimal machine performance. Always refer to the manual for specific deep cleaning recommendations.

  • Soak with water and vinegar solution for 30 minutes.
  • Use a soft-bristle brush to scrub tough areas.
  • Rinse thoroughly with warm water.
  • Dry completely to avoid water spots.

6.3 Storage and Maintenance Tips

To maintain your Nostalgia Popcorn Maker, ensure it is stored properly when not in use. After cleaning, allow the machine to dry completely to prevent moisture damage. Store it in a cool, dry place, away from direct sunlight and heat sources. Avoid stacking heavy objects on top of the machine to preserve its structure. For optimal performance, periodically inspect cords and moving parts for wear and tear. If storing for an extended period, consider covering it with a protective cloth to prevent dust buildup. Always handle the machine with care to avoid scratches or dents. Regular maintenance ensures longevity and consistent popcorn quality. Refer to the manual for specific storage recommendations.

  • Allow the machine to dry fully after cleaning.
  • Store in a cool, dry location.
  • Avoid stacking heavy objects on top.
  • Inspect cords and parts for wear periodically.
  • Cover with a cloth during extended storage.

Troubleshooting Common Issues

Address common issues like the motor not starting or unusual noises by checking power supply and ensuring proper assembly. Clean regularly to avoid clogs and maintain performance.

7.1 Common Problems and Solutions

Common issues with the Nostalgia Popcorn Maker include the motor not starting or unusual noises. Ensure the power supply is stable and the machine is properly assembled. If the popcorn maker stops mid-cycle, check for blockages in the air vents or chute. For uneven popping, verify that the lid is securely closed to maintain heat. If kernels aren’t popping, try adjusting the quantity or ensuring they are fresh. Regular cleaning prevents clogs and maintains efficiency. Refer to the manual for detailed troubleshooting steps, and always unplug the machine before attempting any repairs. Proper maintenance ensures consistent performance and extends the lifespan of your popcorn maker.

7.2 Advanced Troubleshooting Techniques

For more complex issues, inspect internal components like the heating element or motor for wear. Ensure the power cord is undamaged and plugged into a functioning outlet. If the machine overheats, check for blockages in the ventilation system and clean thoroughly. For inconsistent popping, verify kernel moisture levels and ensure even distribution. Advanced users can reset the machine by unplugging it for 30 minutes to reset internal sensors. Lubricate moving parts periodically to prevent friction. If problems persist, consult the warranty or contact customer support for professional assistance. Always prioritize safety by unplugging the device before performing internal inspections or repairs.

Additional Features and Tips

Explore built-in recipes and customizable settings for unique flavors. Perfect for parties, this maker offers large capacity and easy operation, enhancing your popcorn experience with versatility and convenience.

8.1 Customizing Your Popcorn

Customize your popcorn with various seasonings like butter, salt, or herbs. For a sweet twist, try caramel or chocolate drizzle. The Nostalgia Popcorn Maker allows experimentation with different flavors, ensuring each batch is tailored to your taste preferences. With its large capacity, you can create enough for gatherings or personal snacks. The manual includes recipes for classic, cheesy, or spicy popcorn, offering inspiration for diverse creations. This versatility makes the Nostalgia Popcorn Maker a versatile addition to any kitchen, perfect for movie nights, parties, or healthy snacks. Its simplicity encourages creativity, making every popcorn experience unique and enjoyable.

8.2 Health Benefits of Air-Popped Popcorn

Air-popped popcorn is a healthier snack option, as it contains no added oil, making it lower in calories and fat compared to traditional methods. It is rich in whole grains, which support digestive health and provide sustained energy. The antioxidants in whole grains also help lower cholesterol and control blood sugar levels. Air-popped popcorn is naturally gluten-free, making it an excellent choice for those with dietary restrictions. Its high fiber content aids in digestion and keeps you feeling full longer. The Nostalgia Popcorn Maker’s hot air technology ensures a guilt-free snacking experience, offering a delicious and nutritious alternative to fried or microwaved options while preserving the natural flavors of the popcorn kernels.

Accessories and Upgrades

The Nostalgia Popcorn Maker offers optional accessories like measuring cups, butter melters, and flavoring kits to enhance your popcorn experience. These additions simplify and diversify usage.

9.1 Recommended Accessories

To enhance your popcorn-making experience, several accessories are recommended. A measuring cup ensures the perfect amount of kernels, while a butter melter allows for even distribution of flavor. Additionally, flavoring kits offer various seasoning options. A popcorn scoop and -serving bowls are ideal for convenient serving. For added convenience, a cleaning brush helps maintain the machine. These accessories, available separately or in bundles, complement the Nostalgia Popcorn Maker’s functionality, making it a versatile and enjoyable kitchen appliance for any popcorn enthusiast.

Warranty and Support

The Nostalgia Popcorn Maker is backed by a warranty, with details provided in the manual. Customer support is available for inquiries and assistance.

10.1 Understanding Your Warranty

Your Nostalgia Popcorn Maker is protected by a limited warranty, typically covering manufacturing defects for a specified period, usually one year from purchase. The warranty ensures defective parts or malfunctioning units are repaired or replaced free of charge. It’s essential to review the warranty terms in the manual, as coverage varies by region and may exclude damages caused by misuse or improper maintenance. Registration of your product is often required to activate the warranty. For detailed information, refer to the warranty section in your instruction manual. Keeping your purchase receipt and following warranty guidelines helps ensure smooth service if issues arise.

The Nostalgia Popcorn Maker is a fantastic addition to any home, offering a fun and healthier way to enjoy popcorn. Its easy-to-use design and versatile features make it perfect for family gatherings, movie nights, or casual snacks. By following the instructions and maintaining the machine properly, you can enjoy delicious popcorn for years to come. The machine’s durability and warranty provide peace of mind, ensuring your investment is protected. Whether you’re a popcorn enthusiast or just starting out, this maker is a great choice for creating memorable moments with loved ones. Happy popping!

what is a instructional aide

An instructional aide supports teachers and students by assisting with lesson planning, managing classroom materials, and fostering an inclusive learning environment to enhance educational outcomes effectively.

Definition and Overview

An instructional aide, also known as a teaching assistant or paraprofessional, provides essential support to teachers and students in educational settings. Their role involves preparing materials, assisting with lessons, and helping students individually or in small groups. They play a vital part in creating an organized and productive learning environment, ensuring effective delivery of instructional activities and promoting student success.

Roles and Responsibilities

Instructional aides play a crucial role in education, assisting teachers with lesson planning, supporting student learning, and managing classroom resources to ensure an efficient and effective learning environment.

Assisting Teachers in Lesson Planning

Instructional aides play a key role in lesson planning by collaborating with teachers to develop engaging activities, prepare educational materials, and adapt strategies to meet diverse student needs, ensuring lessons are effective and aligned with curriculum goals for all learners.

Supporting Student Learning

Instructional aides provide direct support to students by assisting with assignments, offering individualized attention, and reinforcing concepts taught by teachers. They use various teaching aids and strategies to ensure students grasp the material, fostering academic growth and confidence in a supportive learning environment.

Managing Classroom Materials and Resources

Instructional aides organize and maintain classroom materials, ensuring resources are accessible and well-arranged. They prepare learning aids, distribute supplies, and manage inventory, ensuring everything is available when needed. This support helps create an efficient learning environment, allowing teachers to focus on instruction while students have the tools necessary for success.

Educational Requirements

Becoming an instructional aide typically requires a high school diploma or equivalent, with some roles preferring an associate’s degree or specialized certification in education or a related field.

High School Diploma or Equivalent

A high school diploma or equivalent is the minimum educational requirement for most instructional aide positions. It demonstrates foundational skills in reading, writing, and math, essential for supporting teachers and students. Some employers may prefer or require additional certifications or training, but a diploma is typically the starting point for this role.

Associate’s Degree or Certification

An Associate’s degree or certification is often preferred by employers for instructional aides, providing advanced skills in education and child development. These programs cover classroom management, special education strategies, and curriculum support, preparing aides for more specialized roles or leadership positions within educational settings.

Additional Training and Workshops

Instructional aides often engage in professional development through workshops and training sessions to enhance their skills. These programs focus on classroom management, technology integration, and special education strategies, ensuring aides are equipped to support diverse student needs effectively. Continuous training helps aides adapt to evolving educational practices and improve their ability to assist teachers and students successfully.

Work Environment

Instructional aides primarily work in classroom and school settings, collaborating with teachers and students. Their roles require adaptability to meet diverse educational needs and ensure effective learning support.

Classroom and School Settings

Instructional aides typically work in traditional classroom environments, supporting teachers and students in elementary, middle, or high schools. They may also assist in special education classrooms or resource rooms. Their role involves organizing materials, supervising activities, and ensuring a structured, productive learning atmosphere that promotes student engagement and academic success across various educational settings.

Interaction with Students and Teachers

Instructional aides collaborate closely with teachers to deliver lessons and support students’ learning needs. They interact with students to answer questions, provide individualized attention, and ensure understanding. Aides also communicate with teachers to align activities, share student progress, and contribute to a cohesive educational environment that fosters collaboration and student success.

Adaptability to Diverse Needs

Instructional aides must adapt to diverse student needs, including varying learning styles, special education requirements, and language barriers. They flexibly support individual and group activities, ensuring all students receive tailored assistance. This adaptability enables them to meet the unique demands of the classroom, fostering an inclusive and supportive learning environment for every student.

Key Skills for Success

Instructional aides require strong communication, patience, and organizational skills to effectively support teachers and students. These abilities ensure they can manage tasks, foster learning, and maintain classroom efficiency seamlessly.

Communication and Interpersonal Skills

Effective communication and interpersonal skills are essential for instructional aides to interact with teachers, students, and parents. Clear verbal and written communication ensures seamless collaboration. Active listening, empathy, and patience help build strong relationships, fostering a supportive learning environment. These skills enable aides to address diverse student needs and work cohesively as part of the educational team.

Patience and Empathy

Organizational and Time Management Skills

Organizational and time management skills are essential for instructional aides to efficiently support teachers and students. These skills enable aides to prepare materials, manage classroom resources, and coordinate tasks effectively. Strong organizational abilities ensure lessons run smoothly, while effective time management allows aides to adapt to changing priorities and complete tasks efficiently, supporting a productive learning environment.

Career Path and Advancement

Instructional aides can advance from entry-level roles to specialized positions, such as lead aides or educational specialists. With experience, they may pursue teaching certifications, expanding their career opportunities in education.

Starting as an Instructional Aide

Beginning as an instructional aide involves assisting teachers with daily tasks, supporting student learning, and managing classroom resources. It requires strong communication skills, patience, and the ability to adapt to diverse student needs. This role provides a foundational experience, helping aides develop the skills necessary for future advancement in educational support positions.

Advancing to Lead or Specialist Roles

With experience, instructional aides can advance to lead or specialist roles, overseeing other aides or focusing on specific areas like special education. Additional certifications and leadership skills are often required for these positions, enabling aides to take on more responsibilities and contribute more significantly to educational outcomes.

Pursuing Teaching Certification

Instructional aides can transition into teaching roles by pursuing certification, typically requiring a bachelor’s degree and completion of an educator preparation program. Many aides leverage their classroom experience to enroll in teacher training, gaining practical skills through student teaching. Certification enables them to become licensed educators, expanding their career opportunities and allowing them to directly impact student learning as full-time teachers.

Benefits and Challenges

Instructional aides enjoy job stability and personal fulfillment from supporting students and teachers. However, the role can be emotionally and physically demanding, requiring patience and adaptability daily.

Job Stability and Personal Fulfillment

Instructional aides often experience job stability due to high demand in educational settings. The role provides personal fulfillment by contributing to student growth and supporting teachers, creating a sense of purpose and value in their daily work.

Emotional and Physical Demands

Instructional aides face emotional challenges, such as managing student behaviors and providing individualized attention. Physically, the role may require standing, moving materials, or assisting students with special needs. The demands can be intense, but many find the work deeply rewarding despite the physical and emotional toll it may take.

Qualifications and Certifications

Instructional aides typically require background checks, first aid/CPR training, and may need certifications like paraeducator credentials or specialized training for supporting diverse student needs effectively.

Background Checks and Clearances

Instructional aides often undergo thorough background checks and clearances to ensure safety and security in educational settings. These typically include federal, state, and local screenings to verify an individual’s suitability for working with students and staff, fostering a safe and trustworthy learning environment for all.

First Aid and CPR Training

Instructional aides often receive first aid and CPR training to ensure student safety and preparedness for emergencies. This training enables them to handle minor injuries, sudden illnesses, or accidents effectively, providing immediate care until professional medical help arrives, which is crucial for maintaining a secure and responsive learning environment.

The Impact of Instructional Aides

Instructional aides significantly enhance educational experiences by providing essential support to teachers and students, fostering a productive and inclusive learning environment that promotes academic success and personal growth.

Supporting Student Success

Instructional aides play a vital role in supporting student success by providing individualized attention, reinforcing learning concepts, and monitoring progress. They help students who need extra support, fostering academic confidence and skills. By addressing diverse learning needs, aides ensure students receive the guidance necessary to achieve their educational goals effectively and confidently.

Assisting Teachers Effectively

Instructional aides assist teachers by preparing lesson materials, implementing activities, and evaluating student progress. They help manage classroom tasks, allowing teachers to focus on instruction. By supporting daily operations and student needs, aides enhance the teaching process and contribute to a productive and organized learning environment that benefits both educators and students alike effectively.

Steps to Become an Instructional Aide

Earning a high school diploma, gaining practical experience, and obtaining necessary certifications are essential steps to becoming an instructional aide, ensuring readiness to support educational environments effectively.

Earning a High School Diploma

Earning a high school diploma or equivalent is the first step to becoming an instructional aide, as it demonstrates foundational knowledge and skills necessary for supporting teachers and students effectively in educational settings.

Gaining Practical Experience

Gaining practical experience is crucial for aspiring instructional aides, as it involves volunteering or working part-time in educational settings to develop skills in assisting teachers, supporting students, and managing classroom activities. Hands-on experience helps build confidence and demonstrates commitment to potential employers.

Obtaining Necessary Certifications

Instructional aides often require certifications, such as an Associate’s degree or paraprofessional certification, depending on the employer. Some states mandate specialized training in areas like special education or English language learner support. These certifications validate skills and knowledge, ensuring aides are equipped to assist effectively in diverse educational settings and meet specific program requirements.

Frequently Asked Questions

An instructional aide assists teachers with lesson planning, supports student learning, and manages classroom materials. They play a crucial role in creating an effective educational environment for students.

What is the Role of an Instructional Aide?

An instructional aide supports teachers by assisting with lesson planning, preparing materials, and helping students during activities. They also manage classroom resources, provide individualized student support, and handle administrative tasks, ensuring a smooth and effective learning environment for all students while working closely with educators to achieve educational goals.

How to Become an Effective Aide?

To become an effective instructional aide, focus on understanding the teacher’s goals and lesson plans. Build strong communication skills to interact with students and educators. Demonstrate patience, empathy, and adaptability when supporting diverse learner needs. Stay organized, manage classroom materials efficiently, and seek continuous professional development to enhance your effectiveness in fostering a productive learning environment.

Key Terms and Definitions

An instructional aide is an educational support professional assisting teachers and students during lessons, often managing materials and providing individualized help to ensure effective learning experiences.

Paraphrasing Important Concepts

Paraphrasing key concepts helps clarify the role of instructional aides, emphasizing their support in lesson planning, material preparation, and student assistance. This process ensures understanding of their responsibilities, such as fostering inclusive learning environments and providing individualized support, while highlighting their impact on educational outcomes and the skills required for effectiveness in their role.

Understanding Educational Terminology

Understanding key educational terms helps clarify the role of instructional aides. An instructional aide assists teachers by preparing materials, supporting students, and managing classroom resources. Their role is crucial in creating inclusive learning environments and ensuring effective educational support, contributing significantly to student success and teacher effectiveness.

Summarizing the Role and Importance

Instructional aides are essential educators who support teachers, assist students, and manage classroom resources, ensuring a productive and inclusive learning environment. Their roles are crucial for enhancing student outcomes, fostering academic success, and helping teachers deliver effective lessons. By providing individualized attention and organizational support, instructional aides significantly contribute to the overall quality of education and student development.

Importance in Education

Instructional aides play a critical role in education by supporting teachers, enhancing student learning experiences, and contributing to overall academic success through personalized assistance and resource management.

Contributions to Educational Outcomes

Instructional aides significantly enhance educational outcomes by supporting teachers, enabling personalized learning, and fostering inclusive environments. They assist in implementing strategies, managing resources, and providing individualized attention, ensuring diverse student needs are met and academic success is promoted through structured and effective classroom support systems.

Difference from Other Roles

An instructional aide works under teacher supervision, focusing on supporting lesson delivery and student needs, unlike teacher assistants, who may handle additional administrative tasks independently.

Instructional Aide vs. Teacher Assistant

An instructional aide primarily assists teachers with lesson delivery, manages classroom materials, and supports students, often focusing on individualized needs. In contrast, a teacher assistant may handle additional administrative tasks and independently lead small groups or activities, with more autonomy in classroom management, depending on the school’s specific roles and requirements.

Resources for Instructional Aides

Instructional aides can access training materials, educational tools, and professional development through websites like Google Classroom, Khan Academy, and PBS LearningMedia, enhancing their support capabilities effectively.

Training Materials and Organizations

Instructional aides can benefit from training materials like online courses, workshops, and educational tools provided by organizations such as Google Classroom, Khan Academy, and PBS LearningMedia. Professional organizations like the National Education Association (NEA) and the American Federation of Teachers (AFT) also offer resources and certifications to enhance their skills and support their roles effectively in the classroom.

lifevac instructions

1.1 What is LifeVac?

LifeVac is an FDA-cleared, non-invasive suction device designed to help clear airway obstructions in choking emergencies, providing a portable and easy-to-use solution for all ages.

LifeVac is an FDA-cleared, non-invasive suction device designed to help clear airway obstructions in choking emergencies. It is a portable and easy-to-use solution that works by creating a seal over the nose and mouth to suction out the obstructing object. Suitable for use on adults, children, and infants, LifeVac provides a reliable backup plan for choking incidents. The device is accompanied by instructional materials, including a training booklet and online videos, to ensure proper use. Its simplicity and effectiveness make it a valuable tool for both home and public settings.

1.2 Purpose and Benefits of LifeVac

LifeVac is designed to provide immediate assistance in choking emergencies by safely and effectively clearing airway obstructions. Its primary purpose is to act as a backup solution when traditional first aid methods, like the Heimlich maneuver, fail. A key benefit is its ease of use, requiring minimal training to operate correctly. LifeVac is portable, making it ideal for homes, schools, and public spaces. It offers reassurance for parents of young children and individuals prone to choking, providing a reliable tool to save lives in critical situations.

1.3 Key Features of the LifeVac Device

LifeVac features a non-invasive design with a cushioned mask for a secure seal, ensuring safe and effective suction. It is lightweight, portable, and easy to use, requiring no advanced training. The device includes multiple mask sizes for children, infants, and adults, making it versatile for all ages. LifeVac is FDA-cleared and can be used in emergencies where traditional methods fail. Its simplicity allows anyone, even the victim themselves, to operate it, providing a reliable solution for choking incidents.

When to Use LifeVac

Use LifeVac in choking emergencies when standard first aid methods like back blows or abdominal thrusts fail to clear the airway obstruction effectively.

2;1 Signs and Symptoms of Choking

Common signs of choking include difficulty speaking, coughing, or breathing, with the person often clutching their throat. They may turn blue or exhibit panic. If unconscious, they may require immediate intervention. Recognizing these symptoms quickly is crucial for effective use of LifeVac.

2.2 Determining the Necessity for Intervention

Assess the situation by checking for signs of choking, such as inability to speak, cough, or breathe. Use the ABCDE approach to identify life-threatening conditions. If the person is conscious and unable to clear the obstruction with coughing or manual techniques, intervention with LifeVac is necessary. However, if the person becomes unresponsive, begins to turn blue, or shows signs of cardiac arrest, immediately call 911 and start CPR. LifeVac should be used as a backup when primary methods fail, ensuring timely and appropriate intervention to prevent asphyxiation.

2.3 When to Avoid Using LifeVac

LifeVac should not be used as a replacement for standard first aid techniques like back blows or abdominal thrusts. Avoid using it if the person is able to cough, speak, or breathe normally, as this indicates the airway is not fully blocked. Do not use LifeVac on someone who is unconscious or has already begun to turn blue, as immediate CPR is required. Additionally, LifeVac is not intended for use on individuals who are breathing normally or for non-choking related airway issues. Always ensure the device is used only when necessary and according to its intended purpose.

Preparation and Training

Proper preparation and training are crucial for effective use of LifeVac. Understanding when to use the device, familiarizing oneself with its components, and practicing its application ensures confidence and competence in emergencies.

3.1 Importance of Proper Training

Proper training with LifeVac is crucial for effective and safe use. It ensures users understand how to apply the device correctly, creating a proper seal and using the suction feature effectively. Training also helps identify when intervention is necessary and how to remain calm during emergencies. By familiarizing oneself with the device, individuals can act confidently, reducing the risk of errors; Regular practice reinforces skills, ensuring readiness in critical situations. Proper training not only enhances the device’s effectiveness but also builds user confidence, making it a reliable tool for choking emergencies.

3.2 Step-by-Step Training Guide

A comprehensive training guide ensures users master LifeVac’s operation. Start by familiarizing yourself with the device components. Practice placing the mask correctly on a mannequin or willing participant, ensuring a proper seal. Learn to activate the suction mechanism smoothly and repeat the process if needed. Regular drills help build confidence and muscle memory. Training videos and instructional materials provide visual guidance. Always follow the manufacturer’s instructions and practice in a calm, controlled environment to ensure effectiveness in real emergencies.

3.3 Familiarization with the Device

Familiarizing yourself with LifeVac is crucial for effective use. Begin by handling the device to understand its components, such as the mask, suction mechanism, and size options. Practice assembling and disassembling the unit to ensure readiness. Check the mask sizes to determine the correct fit for adults, children, or infants. Regularly inspect the device for proper function and cleanliness. Understanding how to hold the LifeVac and position it correctly enhances preparedness for emergencies, ensuring swift and confident action when needed.

Step-by-Step LifeVac Instructions

Place the mask over the nose and mouth, create a tight seal, activate the suction to dislodge the object, and repeat if necessary for clearance.

4.1 Placing the Mask Correctly

To ensure proper placement, position the mask over the victim’s nose and mouth, making sure it is centered and forms a tight seal. Select the appropriate mask size from the provided options to fit the victim’s face snugly. Align the mask so it covers both nostrils and the mouth completely. A secure seal is essential for effective suction. Always refer to the instructional booklet or online videos for guidance on proper placement and sizing. Proper mask placement is critical for the LifeVac to function effectively in clearing the airway obstruction.

4.2 Ensuring a Proper Seal

A proper seal is crucial for the LifeVac to function effectively. Ensure the mask is tightly secured over the nose and mouth, with no air leaks. Check that the mask size matches the victim’s face to avoid gaps. Use both hands to gently press the mask, ensuring a firm connection. A secure seal allows maximum suction power to dislodge the obstruction. If the seal is compromised, the device may not work properly. Always verify the mask’s placement and fit before activating the suction to ensure optimal performance and safety.

4.3 Activating the Suction

Once the mask is properly sealed, firmly press the plunger downward with one hand to activate the suction. Use quick, steady force to create the necessary vacuum pressure. This action mimics a forced cough, helping to dislodge the object from the airway. If the obstruction remains after the first attempt, release the plunger and repeat the process as needed. Ensure the device is FDA-cleared and used correctly to maximize effectiveness. Always follow the manufacturer’s instructions and seek medical help immediately if the obstruction persists.

4.4 Repeating the Process if Necessary

If the obstruction remains after the first suction, release the plunger and reassess the situation. Repeat the process by resealing the mask and activating the suction again, up to three times if needed. Ensure the mask remains properly sealed to maintain effective suction. If the object is dislodged, provide first aid if necessary. Always follow the manufacturer’s guidelines and seek immediate medical attention if the choking persists after multiple attempts. Proper training is crucial for effective use in emergencies.

Using LifeVac in Emergency Situations

Stay calm, reassess the victim’s airway, and follow the ABCDE approach to prioritize their safety and well-being during a choking emergency with LifeVac.

5.1 Staying Calm and Reassuring the Victim

Remaining calm is crucial during a choking emergency. Reassure the victim by speaking softly and clearly, explaining each step to reduce panic. This helps the person stay composed and cooperative. Ensure the victim understands the LifeVac device’s purpose and how it will aid in clearing the airway. Maintaining a calm demeanor also allows you to focus on proper device placement and operation. Always prioritize the victim’s comfort and safety, and remind them that help is available and the situation is manageable with the LifeVac.

5.2 Following the ABCDE Approach

The ABCDE approach is a widely recognized method in first aid to identify and treat life-threatening conditions quickly. Airway management is critical, and LifeVac is designed to clear obstructions effectively. Ensure the victim’s airway is open and breathing is restored. Circulation should be monitored to prevent further complications. Disability assessment involves checking for consciousness and neurological responses. Exposure refers to preparing the victim for medical evaluation if necessary. LifeVac aligns with this approach, providing a structured and efficient way to address choking emergencies while maintaining focus on the victim’s overall condition.

5.3 Combining with Other First Aid Techniques

LifeVac can be used in conjunction with traditional first aid methods, such as the Heimlich maneuver or back blows, to enhance choking rescue efforts. If initial techniques fail, LifeVac provides an additional solution to clear the airway. It is essential to follow proper choking protocols and use LifeVac as a follow-up intervention if needed. The device’s portability and ease of use make it a valuable addition to first aid kits, ensuring quick and effective assistance in emergency situations while maintaining alignment with established first aid practices.

Special Considerations

This section covers using LifeVac on children, adults, and self-application, ensuring safe and effective use across all age groups and situations.

6.1 Using LifeVac on Children and Infants

LifeVac is suitable for use on children and infants, providing a safe and effective solution for choking emergencies. The device includes multiple mask sizes to ensure a proper fit. For infants, it’s crucial to use the smallest mask and follow the same suction procedure as for adults. Parents and caregivers should receive proper training to use LifeVac confidently on younger victims. It’s important to attempt back blows first before using the device. LifeVac’s portability makes it a vital tool for families with young children, offering reassurance in critical situations. Always consult a healthcare professional for infants under 1 year old.

6.2 Using LifeVac on Adults

LifeVac is effective for adults of all sizes, providing a reliable solution for choking emergencies. The adult-sized mask ensures a proper seal over the nose and mouth. After placing the mask correctly, activate the suction to create negative pressure and dislodge the obstruction. If the object is not dislodged, repeat the process as needed. The device’s simplicity allows anyone to use it, even with minimal training, making it a valuable tool for both home and public settings. Always follow the ABCDE approach to assess and address the situation effectively.

6.3 Using LifeVac on Yourself

LifeVac can be used on yourself in a choking emergency. Place the mask over your nose and mouth, ensuring a proper seal. Activate the suction to create negative pressure and dislodge the object. If unsuccessful, repeat the process. Stay calm and follow the ABCDE approach to assess and address the situation. If the obstruction persists, seek immediate medical help. The device’s simplicity allows for self-use with minimal training, providing reassurance and a potential lifesaving solution in critical moments.

Maintenance and Storage

Regularly clean the LifeVac with mild soap and water, ensuring no moisture remains. Store it in a dry, accessible place, and check for expiry or damage periodically.

7.1 Cleaning the Device

To maintain the LifeVac device’s effectiveness, clean it after each use. Use mild soap and lukewarm water to wipe down the unit and masks. Avoid harsh chemicals or abrasive materials, as they may damage the components. Ensure the mask is detached and thoroughly rinsed. Allow all parts to air dry before storing. Regular cleaning prevents contamination and ensures the device remains ready for emergencies. Always refer to the LifeVac Instructional Booklet for detailed cleaning instructions.

7.2 Storing the Device Properly

Store the LifeVac device in a cool, dry place, away from direct sunlight and moisture. Keep it in the provided storage case to protect it from dust and damage. Ensure all components, including masks, are clean and dry before storage. Regularly inspect the device for any signs of wear or damage. Always check the expiry date of the device and replace it as recommended. Proper storage ensures the LifeVac remains ready for use in emergencies. Store it in an easily accessible location for quick retrieval when needed.

7.4 Checking for Expiry or Damage

Regularly inspect the LifeVac device for any visible damage, such as cracks or detachment of parts. Check the expiry date printed on the device to ensure it is still usable. Before each use, verify that the mask forms an airtight seal and the suction mechanism functions properly. If any damage or wear is detected, replace the device immediately. Refer to the user manual for specific guidance on checking for expiry and damage to ensure the device remains effective in emergencies.

FAQs and Customer Support

Visit our FAQs page for answers to common questions. Contact customer support at 1-877-543-3822 or email support@lifevac.net for assistance. Check our website for additional resources.

8.1 Common Questions About LifeVac

Common questions about LifeVac often revolve around its effectiveness, ease of use, and comparison to traditional methods like the Heimlich maneuver. Users also inquire about its suitability for various age groups and how it differs from other choking relief devices. Many ask if it can be used on oneself and if prior training is required. Additionally, questions about maintenance, storage, and warranty are frequent. For more details, visit the FAQs page or contact customer support for assistance.

8.2 Contacting Customer Service

For assistance with LifeVac, customers can contact the dedicated support team via phone at 1-877-543-3822 during business hours or by emailing support@lifevac.net. The team is available to address questions, provide troubleshooting, and offer guidance on product usage. Whether you need help with device maintenance, have questions about training, or require information on warranty, the customer service team is ready to assist. Visit the official website for more details on how to reach them and receive support tailored to your needs.

8.3 Troubleshooting Common Issues

Common issues with LifeVac may include improper mask sealing or suction failure. Ensure the mask is correctly sized and centered on the victim’s face. Check for blockages in the device or tubing. If the suction fails, verify the mask is securely attached and the unit is properly assembled. For persistent issues, refer to the instructional booklet or contact customer support. Regular cleaning and maintenance can also prevent malfunctions, ensuring the device is ready for emergencies.

Additional Resources

Explore instructional videos, user testimonials, and expert endorsements to enhance your understanding and confidence in using LifeVac effectively in emergency situations.

9.1 LifeVac Instructional Videos

LifeVac instructional videos are essential resources for understanding proper device usage. Available on platforms like YouTube, these videos demonstrate step-by-step guidance, including mask placement, creating a proper seal, and activating suction. They also cover scenarios for adults, children, and infants, ensuring users are prepared for various emergencies. The videos emphasize the importance of staying calm and following the ABCDE approach. Additionally, they provide visual aids to complement written instructions, making learning intuitive and accessible for all users. These videos are a valuable tool for both initial training and refreshers.

9.2 User Testimonials and Reviews

LifeVac has received overwhelming positive feedback from users who credit it with saving lives during choking emergencies. Parents praise its effectiveness on children, while adults appreciate its ease of use. Many users highlight the reassurance it provides as a backup plan for choking incidents. Testimonials often mention the device’s simplicity and the confidence it instills. Reviews frequently emphasize its value as a must-have first aid tool. Users also appreciate the supportive customer service and clear instructional materials. Overall, LifeVac is widely regarded as a lifesaving, reliable, and essential emergency device.

9.3 Medical Professional Endorsements

Medical professionals and certified CPR instructors endorse LifeVac as a valuable tool in choking emergencies. Many recommend it as an alternative or supplement to traditional methods like the Heimlich maneuver. Its ease of use and effectiveness have garnered support from healthcare experts, who appreciate its non-invasive design. LifeVac is often praised for its ability to provide immediate relief in high-stress situations, making it a trusted addition to first aid kits and emergency response plans. Professionals highlight its suitability for all ages, including children and adults.

carlson pet products gate instructions

Carlson Pet Products offers safe, easy-to-install gates for pet containment. Models like the Lil Tuffy and Tuffy expandable gates provide flexibility. Step-by-step guides and video tutorials ensure proper installation.

Overview of Carlson Pet Products

Carlson Pet Products specializes in creating durable, user-friendly gates and pet containment solutions. Their product line includes expandable gates, walk-thru gates, and portable options designed for convenience. Models like the Lil Tuffy and Tuffy gates are popular for their ease of installation and versatility. The company emphasizes safety, with features like secure locking mechanisms and wall-mounting systems. Carlson also offers accessories like extensions for wider openings and provides detailed manuals for easy setup. Their products cater to various pet sizes and home layouts, ensuring a reliable solution for pet owners.

Importance of Proper Gate Installation

Proper installation of Carlson Pet gates is crucial for ensuring safety and functionality. Incorrect installation can lead to gaps or unstable structures, posing risks to pets and children. Following the manufacturer’s guidelines helps prevent accidents and injuries. Securely mounting the gate prevents it from tipping or shifting, creating a reliable barrier. Regular inspections are also vital to maintain the gate’s integrity and address any wear or tear promptly. Proper installation ensures peace of mind and effective pet containment.

Materials and Tools Needed for Installation

Carlson Pet gates often come with wall-mounting hardware. Basic tools like a screwdriver or drill may be needed. Additional materials like measuring tape or spacers can assist.

List of Required Tools

For installing Carlson Pet gates, basic tools are needed. A screwdriver or drill is often required for wall mounting. Measuring tape ensures accurate positioning. Allen wrenches may be necessary for adjusting hardware. Pencil marks help guide bracket placement. Level ensures the gate is straight. No heavy machinery is needed. Some models are tool-free, but having these tools on hand guarantees a smooth installation process. Additional materials like spacers or shims may assist for uneven surfaces.

Hardware Included in the Package

The Carlson Pet gate package includes essential hardware for secure installation. Wall-mounting brackets are provided to attach the gate firmly to your walls. Screws and bolts are included to ensure a sturdy fit. Spacers or shims may also be provided to accommodate uneven surfaces. Some models come with extension kits for wider openings. The hardware is designed for easy assembly and durability. No additional tools are needed for most installations, making the process straightforward. The included components ensure a safe and stable setup for your pet gate.

Additional Materials for Secure Installation

For enhanced stability, consider using wall anchors or screws suitable for your wall type. Anti-slip pads can prevent the gate from shifting on smooth floors. Extra brackets may be needed for wider openings or uneven surfaces. Double-sided adhesive strips can reinforce the mounting points. Ensure all materials are compatible with the gate’s hardware. These optional additions provide extra security, especially in high-traffic areas or for larger pets. They help maintain the gate’s stability and prevent potential damage to your walls or the gate itself.

Step-by-Step Installation Guide

Expand the gate to desired width, attach wall-mounting brackets, and secure the gate in place. Follow manufacturer instructions for a safe, tool-free installation process.

Expanding the Gate to Desired Width

Start by sliding the gate to the desired width, ensuring it fits snugly in the doorway or area. Secure the gate by lifting the locking pin and twisting the plastic knob until it clicks. This creates a firm hold without tools. Ensure the gate is evenly balanced and free of gaps for stability. Proper expansion ensures a secure fit, preventing shifts or accidents. Always check the manufacturer’s guidelines for maximum width capacity to ensure safety and optimal performance.

Attaching Wall-Mounting Brackets

Mounting brackets are essential for securing the gate. Attach them to the wall at the desired height, ensuring proper alignment with the gate’s frame. Use screws to fasten them firmly. Once installed, slide the gate into the brackets, ensuring a snug fit. Secure the gate by tightening the locking mechanism. Proper bracket attachment ensures stability and prevents the gate from shifting. Follow manufacturer instructions for precise placement and tightening to ensure a safe and durable installation.

Securing the Gate in Place

After attaching the wall brackets, slide the gate into position. Twist the plastic knob to tighten the locking mechanism, ensuring a secure fit. No tools are needed. Check the gate’s alignment and adjust if necessary. For added stability, ensure the gate is expanded to the correct width. The patented lock system creates the right pressure for a firm hold. Regularly inspect the gate’s position and tighten the knob to maintain security and prevent any shifting over time.

Troubleshooting Common Installation Issues

Common issues include gate misalignment or hardware malfunctions. If the gate doesn’t fit securely, check the width adjustment and locking mechanism. Ensure brackets are evenly mounted. For alignment problems, adjust the gate’s position and tighten the knob firmly. If hardware fails, refer to the manual or contact customer support. Regularly inspect for loose parts and tighten as needed. Addressing these issues promptly ensures stability and safety, preventing potential accidents or damage to the gate or surrounding area over time.

Understanding Carlson Pet Gate Models

Carlson offers various pet gate models, including expandable and walk-thru designs, catering to different home environments and pet sizes for flexibility, safety, and ease of use.

Carlson Lil Tuffy Expandable Pet Gate

The Carlson Lil Tuffy Expandable Pet Gate is a versatile solution for pet containment. It expands to fit various widths and is easy to install without tools. Designed for durability, it features a locking mechanism for secure positioning. The gate is lightweight yet sturdy, suitable for small to medium-sized pets. Its compact design makes it ideal for narrow spaces, while the expandable feature accommodates larger areas. Easy to reposition, it offers flexibility for different home environments, ensuring both pet and household safety with minimal effort.

Carlson Tuffy Expandable Pet Gate

The Carlson Tuffy Expandable Pet Gate is a durable, versatile option for managing larger pets. It expands to fit various doorways and hallways, providing a secure barrier. Easy to install, it requires no tools and uses a wall-mount system for stability. The gate features an automatic locking mechanism for added safety. Its expandable design allows for flexibility, while optional extensions can be added for wider spaces. Designed for strength, it is ideal for active households with bigger pets, ensuring both containment and ease of use.

Carlson Extra Wide Walk-Thru Pet Gate

The Carlson Extra Wide Walk-Thru Pet Gate is designed for larger openings, offering a secure and convenient solution for pet containment. Its sturdy design and wide framework make it ideal for doorways, hallways, and staircases. The gate features an easy-to-follow installation process with a patented lock and screw system, ensuring a secure fit. It also includes optional extensions for wider spaces and a walk-through design for easy access. Perfect for homes with larger pets, this gate provides both functionality and durability, making it a reliable choice for pet owners.

Safety Precautions and Best Practices

Always follow manufacturer guidelines for secure installation. Regularly inspect the gate for damage and ensure proper fit. Prevent accidents by maintaining stability and adhering to safety instructions.

Ensuring a Secure Fit to Prevent Accidents

A secure fit is crucial for pet safety. Always follow installation guidelines, ensuring the gate is properly mounted and adjusted. Expand the gate to the desired width, lift the locking pin, and twist the knob to secure it firmly. Check stability regularly and tighten any loose hardware. Avoid using excessive force, which may damage the gate or wall. Ensure all extensions are correctly attached and never exceed the recommended number. Regular inspections will help prevent accidents and maintain your gate’s effectiveness.

Regular Maintenance and Inspection

Regular maintenance ensures your Carlson pet gate remains safe and functional. Check all hardware for tightness and inspect for wear. Lubricate hinges if they squeak. Clean the gate regularly to avoid dirt buildup. Inspect expansion mechanisms and locking pins for proper alignment. Ensure no extensions are damaged or loose. Replace any worn-out parts promptly. Schedule monthly inspections to maintain reliability and prevent potential hazards, keeping your pet safe and secure.

Guidelines for Pet Safety Around the Gate

Always supervise pets near the gate to ensure their safety. Teach pets to interact with the gate gently to avoid damage or injury. Ensure the gate is securely installed to prevent collapse. Keep the area around the gate clear of hazards or objects pets might trip over. Regularly check the gate’s stability and adjust as needed. For aggressive chewers or climbers, consider additional safety measures. Follow manufacturer guidelines to ensure the gate is used correctly for your pet’s size and behavior, promoting a safe environment for your furry friends.

Additional Features and Accessories

Carlson Pet Products offers optional extensions for wider openings and portable designs for easy repositioning, enhancing functionality and versatility for various home settings.

Optional Extensions for Wider Openings

Carlson Pet Products offers optional extensions in sizes of 4, 6, 12, and 24 inches to accommodate larger spaces. These extensions are easy to install and provide flexibility for various doorway or hallway widths. They are available at most retailers carrying Carlson products, ensuring compatibility and ease of use. The extensions allow users to customize their gate to fit specific needs without compromising safety or stability. Simply attach the extensions to the existing gate for a seamless and secure fit, ensuring proper installation as per the manufacturer’s guidelines.

Portability and Ease of Repositioning

Carlson pet gates are designed for easy repositioning, making them ideal for temporary or flexible use. The lightweight and compact design allows users to move the gate between rooms or locations effortlessly. The included wall-mounting hardware can be quickly installed and removed without causing damage, ensuring the gate can be repositioned as needed. This feature is particularly useful for pet owners who require versatile solutions for different areas of their home, providing convenience without compromising on safety or stability.

Warranty and Product Support

Carlson Pet Products offers a limited warranty covering manufacturing defects. Customers can access support via phone or email for assistance. Detailed resources, including PDF manuals, are available online to ensure optimal product use and troubleshooting. This comprehensive support system provides peace of mind and assistance for any issues that may arise with their pet gates.

Manufacturer’s Warranty Details

Carlson Pet Products provides a limited warranty covering manufacturing defects for a specified period. The warranty ensures defective parts are repaired or replaced free of charge. Coverage typically lasts one year from the purchase date, with proof of purchase required. This warranty underscores Carlson’s commitment to quality and customer satisfaction, offering protection against defects in materials and workmanship. For detailed terms and conditions, customers can refer to the product manual or contact customer support directly.

Customer Support and Assistance

Carlson Pet Products offers dedicated customer support to assist with installation, troubleshooting, and product inquiries. Customers can access PDF manuals and install tutorials on the official website. For further help, support is available through contact forms, phone, or email. The team provides guidance on resolving common issues and ensures a smooth experience with Carlson gates. This comprehensive support system aims to address customer needs promptly and effectively, ensuring satisfaction and ease of use.

Accessing PDF Manuals and Resources

Carlson Pet Products provides easy access to PDF manuals and installation guides for their gates. Visit their official website and navigate to the support section to download specific product manuals. These resources include step-by-step instructions, troubleshooting tips, and safety guidelines. Additional video tutorials are available on their YouTube channel, offering visual guidance for setup and maintenance. Ensuring customers have all necessary information to install and use their gates correctly is a priority for Carlson Pet Products.

Troubleshooting Common Issues

Troubleshooting common issues with Carlson pet gates involves addressing alignment problems and hardware malfunctions. Refer to the manual or contact customer support for assistance and solutions.

Resolving Gate Alignment Problems

Gate alignment issues can often be resolved by ensuring the gate is properly expanded to fit the desired width. Check that the locking pin is securely engaged and the plastic knob is tightened firmly. If the gate sags, verify that the wall brackets are evenly aligned and tightly secured. Adjust the brackets slightly if necessary. For uneven surfaces, consider using shims to level the gate. Regularly inspect the hardware and tighten any loose components to maintain proper alignment and stability over time.

Addressing Hardware Malfunctions

Hardware malfunctions, such as a faulty locking pin or loose brackets, should be addressed promptly. Inspect the affected parts and tighten any loose screws or bolts. If components are damaged, refer to the Carlson warranty for potential replacements. Lubricate moving parts to ensure smooth operation. Regular maintenance, including checking for wear and tear, can prevent future issues. For severe malfunctions, contact Carlson’s customer support for assistance or replacement parts to ensure the gate functions safely and effectively;

When to Contact Customer Support

Contact Carlson’s customer support if you encounter issues beyond basic troubleshooting. This includes hardware malfunctions not covered by DIY fixes, gate alignment problems that persist after adjustments, or missing parts. For warranty claims, defective products, or complex installation challenges, their team provides assistance. Visit their official website or call their support line for help. They also offer PDF manuals and resources to guide you, ensuring your gate functions correctly and safely for your pet.

Carlson Pet Products gates offer reliable, safe solutions for pet containment. With easy installation and durable designs, they provide peace of mind for pet owners. Follow instructions carefully for optimal performance and safety.

Final Thoughts on Carlson Pet Gates

Carlson Pet Products offers reliable, durable gates designed for easy installation and pet safety. Models like the Lil Tuffy and Extra Wide Walk-Thru provide flexibility and security. With optional extensions and accessories, these gates adapt to various home settings. Their focus on safety features ensures peace of mind for pet owners. By following the provided instructions, users can achieve a secure and hassle-free setup. Carlson gates are a practical solution for keeping pets safe and contained indoors.

Encouragement for Proper Usage

Proper installation and usage of Carlson pet gates ensure safety and effectiveness. Always follow the provided instructions and inspect the gate regularly to prevent accidents. By securing the gate correctly, you protect both your pet and home. Carlson’s durable designs offer long-term reliability, but proper maintenance is key. Encourage responsible usage by keeping the gate tightly closed and supervising pets near it. This ensures a safe environment for everyone while maintaining the gate’s functionality and longevity. Regular checks and adherence to guidelines promote peace of mind for pet owners.

10×30 canopy 10×30 party tent instructions

The 10×30 canopy party tent is a spacious‚ versatile shelter ideal for outdoor events‚ offering durability and ease of setup. Perfect for parties‚ gatherings‚ or celebrations‚ it provides reliable shade and protection. With its sturdy frame and waterproof canopy‚ it ensures a comfortable environment for guests. Follow the instructions carefully to ensure safe and proper assembly.

1.1 Overview of the 10×30 Canopy Tent

The 10×30 canopy tent is a large‚ versatile shelter designed for outdoor events‚ offering ample space for gatherings. Its sturdy frame and durable‚ waterproof canopy provide reliable protection from the elements. Easy to assemble with step-by-step instructions‚ it ensures a quick setup for parties‚ celebrations‚ or temporary shade solutions‚ making it a practical choice for various outdoor needs.

1.2 Importance of Following Assembly Instructions

Adhering to the assembly instructions ensures the 10×30 canopy tent is erected safely and correctly. Proper setup prevents structural issues‚ enhances stability‚ and extends the product’s lifespan. Deviating from guidelines can lead to unsafe conditions and potential damage. Careful following of steps guarantees a secure and durable shelter‚ optimizing its performance during events and harsh weather conditions.

Safety Precautions and Warnings

Ensure the area is clear of overhead and underground obstructions. Use proper tools and follow guidelines to avoid accidents. Safety is crucial for a secure setup.

2.1 General Safety Guidelines

Always read and follow the manufacturer’s instructions carefully. Wear protective gear like gloves and safety glasses during assembly. Ensure the tent is on level ground‚ away from power lines and obstructions. Never assemble in windy or stormy conditions. Use appropriate tools and avoid over-tightening parts to prevent damage or injury. Safety should always come first to ensure a secure setup and enjoyable use of your 10×30 canopy party tent.

2.2 Checking for Overhead and Underground Obstructions

Before setting up the 10×30 canopy tent‚ inspect the area for overhead obstructions like power lines‚ branches‚ or structures. Check for underground utilities‚ cables‚ or pipes to avoid damage or hazards. Ensure the site is clear of debris and obstructions to guarantee a safe and stable installation. Proper site preparation is essential for a secure and functional setup.

Preparing the Site for Setup

Clear the area of debris‚ vegetation‚ and obstructions. Ensure the ground is level and firm for stable installation. Proper site preparation is crucial for safety and functionality.

3.1 Choosing a Suitable Location

Select a flat‚ open area away from overhead obstructions like branches or power lines. Ensure the ground is dry and firm to prevent instability. Avoid low-lying spots to reduce water pooling risks. Check for underground utilities to prevent accidental damage during setup. A well-chosen location enhances safety and ensures optimal performance of the canopy tent.

3.2 Clearing and Leveling the Ground

Remove debris‚ rocks‚ and vegetation from the setup area to ensure a smooth surface. Use a rake or shovel to level the ground‚ ensuring evenness. If necessary‚ fill in low spots with dirt or sand. A level surface prevents the tent from shifting and ensures proper stake anchorage‚ enhancing stability and safety during assembly and use.

Unboxing and Inventory of Parts

Begin by carefully unboxing all components‚ including poles‚ connectors‚ stakes‚ and the canopy. Organize parts by type and cross-reference with the provided inventory list to ensure nothing is missing before starting assembly. This step is crucial for a smooth setup process.

4.1 Verifying the Complete Set of Parts

Upon unboxing‚ meticulously verify each component against the provided inventory list. Ensure all poles‚ connectors‚ stakes‚ ropes‚ and the canopy are present and undamaged. This step prevents delays during assembly and guarantees all necessary items are available. Double-check for any missing or damaged parts to avoid complications later and ensure a successful setup.

4.2 Understanding the Components and Hardware

Familiarize yourself with the components‚ including the frame‚ canopy‚ stakes‚ ropes‚ and hardware. The frame consists of side poles‚ crossbars‚ and connectors. Hardware includes bolts‚ nuts‚ and clips. Understanding each part’s function ensures proper assembly. Organize the hardware to avoid confusion and verify all items match the inventory list for a smooth setup process.

Step-by-Step Assembly Instructions

Begin by assembling the frame‚ then attach the canopy securely. Use stakes and ropes to anchor the tent firmly. Finally‚ install optional wall panels for added protection.

5.1 Assembling the Frame

Start by laying out the frame parts on flat ground. Attach the side poles to the corner pieces‚ ensuring all connectors are securely locked. Next‚ connect the crossbars to form the tent’s rectangular shape. Use the provided Allen wrench to tighten all bolts firmly. Double-check each joint for stability before moving on to the next step.

5.2 Attaching the Canopy Top

Place the canopy top evenly over the assembled frame. Align the canopy’s Velcro straps or hooks with the frame’s corresponding connectors. Tighten the straps securely to ensure a snug fit. Use the provided ropes to tie down the canopy corners to the frame‚ ensuring it is taut and properly centered. Check for any wrinkles or sagging areas and adjust as needed for a secure fit.

5.3 Securing the Tent with Stakes and Ropes

Insert stakes into the ground at a 45-degree angle through the tent’s stake loops. Tighten the ropes around the frame‚ ensuring even tension. Double-check all connections for stability. For added security‚ tie ropes to nearby anchors if available. Ensure the tent is firmly anchored to withstand wind and weather conditions‚ following the manufacturer’s guidelines for proper securing techniques.

5.4 Installing Optional Wall Panels

Attach wall panels by aligning their Velcro strips with the canopy’s edges. Insert the top pins into the ring holders on the frame. Ensure a snug fit and secure the bottom with stakes. Tighten ropes around the frame to hold panels firmly in place. Check for proper alignment and tension to maintain structural integrity and weather resistance.

Tools and Materials Required

Essential tools include an Allen wrench‚ hammer‚ rope tightener‚ and stakes. Additional materials like sandbags or weights may be needed for added stability. Ensure all tools are readily available to streamline the assembly process and guarantee a secure setup.

6.1 Essential Tools for Assembly

The essential tools for assembling the 10×30 canopy party tent include an Allen wrench‚ hammer‚ screwdrivers‚ pliers‚ measuring tape‚ and rope tightener. Additional materials like stakes‚ sandbags‚ or weights may be required for stability. Ensure all tools are readily available to facilitate a smooth and efficient assembly process without delays.

6.2 Additional Materials Needed for Stability

For added stability‚ consider using sandbags‚ weights‚ or heavy-duty stakes. Long anchor ropes and tie-down straps can secure the tent in windy conditions. Concrete footings or ground augers may be necessary for soft or uneven terrain. Ensure all additional materials are durable and suitable for outdoor use to maintain the tent’s structural integrity and safety.

Common Mistakes to Avoid

Avoid improper frame alignment‚ which can lead to structural weakness. Not securing stakes tightly can cause instability. Skipping steps or ignoring safety guidelines may result in damage or safety hazards. Always follow the assembly instructions precisely to ensure a stable and secure setup of your 10×30 canopy party tent;

7.1 Incorrect Order of Assembly

Assembling the tent out of sequence can lead to structural instability and safety hazards. Ensure all parts are identified and assembled in the order specified. Missing a step or misaligning frames can result in a weakened structure. Double-check the instructions and verify each component before proceeding to maintain stability and ensure a secure setup.

7.2 Overlooking Critical Safety Steps

Ignoring safety steps can lead to structural instability or collapse. Always check for overhead obstructions and ensure the ground is level. Failure to secure stakes properly or tighten ropes can result in the tent collapsing‚ especially in windy conditions. Neglecting these steps poses risks to safety and may cause damage to the tent or injury to people nearby.

Troubleshooting Common Issues

Common issues include frame misalignment‚ loose connections‚ or canopy damage. Check for tightness in all bolts and ensure the canopy is securely attached. Address leaks promptly.

8.1 Resolving Frame Alignment Problems

If the frame is misaligned‚ start by loosening all connectors and repositioning the legs. Ensure the frame is on a level surface and tighten bolts progressively. Check for evenness and stability. If issues persist‚ verify all hardware is securely attached and refer to the assembly diagrams for proper alignment. Patience and careful adjustment are key to resolving frame misalignment effectively.

8.2 Fixing Leaks or Damage to the Canopy

To fix leaks or damage‚ inspect the canopy for holes or tears. Apply a waterproof sealant to small punctures or use a patch kit for larger damage. Ensure the canopy is tightly secured to the frame to prevent further stress. Regularly cleaning and drying the canopy can also help prevent mold and extend its lifespan. Always follow the manufacturer’s repair guidelines for best results.

Maintenance and Storage Tips

Regularly clean the canopy with mild detergent to prevent dirt buildup. Store the tent in a dry‚ cool place‚ ensuring all parts are securely packed to avoid damage.

9.1 Cleaning and Preserving the Canopy

Use mild detergent and lukewarm water to clean the canopy‚ avoiding abrasive cleaners or scrubbers. Rinse thoroughly and allow it to air dry to prevent mildew. Store the canopy in a dry‚ cool place‚ away from direct sunlight‚ to maintain its durability and water-resistant properties. Regular cleaning ensures longevity and optimal performance.

9.2 Proper Storage to Extend Lifespan

Store the canopy and frame separately in a dry‚ cool place. Use the provided storage bags to protect against dust and moisture. Ensure all parts are clean and completely dry before storing to prevent mold and rust. Avoid folding or bending the canopy excessively to maintain its structural integrity and ensure it remains in excellent condition for future use.

Warranty and Customer Support Information

The 10×30 canopy party tent typically comes with a limited warranty covering manufacturing defects. For inquiries or issues‚ contact customer support via phone or email for assistance and troubleshooting.

10.1 Understanding the Warranty Coverage

The warranty for the 10×30 canopy party tent covers manufacturing defects for a specified period‚ typically one year. It ensures replacement or repair of faulty parts‚ excluding damage from misuse or natural disasters. Review the manual for detailed terms and conditions to understand what is included and excluded from the coverage.

10.2 Contacting Customer Service

For assistance with the 10×30 canopy tent‚ contact customer service via phone at (949) 344-2588 or visit www.bellezefurniture.com. They provide support for warranty claims‚ assembly issues‚ and general inquiries. Ensure to have your order details ready for efficient service. Their team is available to help resolve any concerns promptly and effectively.

Tips for Using the Tent in Different Weather Conditions

Optimize your 10×30 canopy tent for various weather by securing it tightly in wind‚ using waterproof coatings for rain‚ and ensuring proper ventilation to prevent moisture buildup indoors.

11.1 Setup in Windy Conditions

For windy conditions‚ ensure the 10×30 canopy tent is securely anchored with sturdy stakes and ropes. Tighten all connections and use weights or sandbags for added stability. Position the tent to face away from strong winds‚ and avoid loose fabrics that could catch the wind. Always follow the manufacturer’s guidelines for wind resistance to ensure safety and prevent damage.

11.2 Preparing for Rain or Snow

Ensure the 10×30 canopy tent is waterproof and properly sealed at seams. Clear the area of debris and slope the ground slightly for water runoff. For snow‚ remove accumulation promptly to prevent weight damage. Tighten the frame and use additional support like weights or brackets. Always follow the manufacturer’s guidelines for weather-specific preparation to maintain stability and safety.

Visual Guide and Diagrams

Refer to the included diagrams for clear‚ step-by-step visuals of the assembly process. Detailed illustrations of frame assembly‚ canopy attachment‚ and hardware identification ensure accuracy and ease.

12.1 Assembly Diagrams

The assembly diagrams provide a visual breakdown of the 10×30 canopy tent setup. Detailed illustrations guide users through frame construction‚ canopy attachment‚ and hardware installation. Color-coded labels and numbered steps ensure clarity. These diagrams are essential for understanding the assembly process‚ especially for those less familiar with tent setups. Refer to them alongside the written instructions for a seamless experience.

12.2 Hardware Identification

Identify hardware components like bolts‚ screws‚ and plastic angles. Each part is labeled with its purpose‚ ensuring easy recognition. The diagrams illustrate where each piece fits‚ preventing mismatches. Clear labels and descriptions guide users in distinguishing between similar-looking parts. This section helps users understand the role of each hardware item in the assembly process‚ ensuring a smooth setup experience.

Customer Reviews and Testimonials

Customers praise the 10×30 canopy tent for its durability and ease of setup. Many highlight its versatility for hosting events‚ with satisfaction in its performance under various weather conditions.

13.1 User Experiences with the 10×30 Canopy Tent

Users share positive experiences with the 10×30 canopy tent‚ emphasizing its ease of assembly and durability. Many appreciate its spacious interior and weather resistance‚ making it ideal for outdoor events. Customers highlight its versatility for parties‚ weddings‚ and gatherings‚ noting it provides reliable shade and protection. Satisfaction is high‚ with many recommending it for its value and performance.

13.2 Feedback on Assembly Process

Users generally find the assembly process manageable‚ though some note it requires patience and assistance. Clear instructions and diagrams are praised‚ while others suggest organizing parts beforehand. Overall‚ the process is doable with basic tools‚ but teamwork is often recommended for efficiency and stability‚ ensuring a secure setup for safe and enjoyable use.

Comparison with Similar Products

The 10×30 canopy party tent stands out for its durability and spacious design compared to smaller models like the 10×20 or 15×15. Its robust frame and waterproof canopy offer superior weather resistance‚ making it a popular choice for large events. It rivals other brands in ease of assembly and stability‚ ensuring excellent value for its size and features.

14.1 Differences from Other Canopy Tents

The 10×30 canopy party tent distinguishes itself with its larger coverage area‚ making it ideal for big events. Unlike smaller models like the 10×20 or 15×15‚ it offers more space for guests and activities. Its sturdy frame and waterproof design ensure better durability and weather resistance compared to similar products. The tent’s modular structure also allows for optional wall panels‚ enhancing versatility and customization.

14.2 Unique Features of the 10×30 Model

The 10×30 canopy tent boasts an expansive 300 sq. ft. coverage‚ making it perfect for large gatherings. Its durable‚ waterproof canopy and rust-resistant frame ensure long-lasting performance. The tent includes adjustable height settings and optional wall panels for enhanced customization. Additionally‚ its easy setup process and portable design make it ideal for various outdoor events‚ setting it apart from smaller or less durable models.

Frequently Asked Questions (FAQs)

Explore common questions about assembly‚ setup‚ and maintenance. Find answers to ensure a smooth experience with your 10×30 canopy party tent.

15.1 Common Questions About Assembly

What tools are needed for assembly? Do I need help‚ or can I do it alone? How long does it take? These are common questions. Ensure all parts are included and follow instructions step-by-step. Troubleshooting frame alignment is also a frequent query. For beginners‚ assembly may take about 1.5 hours with basic tools. Always double-check connections for stability and safety.

15.2 Answers to Setup and Maintenance Queries

Regularly clean the canopy with mild detergent to maintain its appearance. Store the tent in a dry‚ cool place to prevent damage. For setup‚ ensure the ground is level and clear of debris. If leaks occur‚ inspect and repair the canopy promptly. Always follow the manufacturer’s guidelines for maintenance to extend the tent’s lifespan and ensure safety.

The 10×30 canopy party tent offers durability‚ versatility‚ and ease of setup‚ making it ideal for various events. Proper assembly and maintenance ensure a successful and safe experience.

16.1 Final Thoughts on the 10×30 Canopy Tent

The 10×30 canopy party tent is a durable‚ versatile‚ and reliable solution for outdoor events. Its spacious design and easy setup make it ideal for parties‚ weddings‚ or gatherings. With proper care and assembly‚ it provides excellent protection from the elements. Adhering to the instructions ensures longevity and safety‚ making it a worthwhile investment for any event organizer or homeowner.

16.2 Encouragement to Follow Instructions Carefully

Adhering to the assembly instructions is crucial for ensuring the tent’s stability‚ safety‚ and longevity. Proper setup prevents structural issues and enhances weather resistance. By following the guide‚ you’ll maximize the tent’s performance and extend its lifespan. Take your time to review each step carefully‚ and don’t hesitate to seek help if needed. Your attention to detail will ensure a successful and enjoyable setup experience.

singer 99k instruction manual

Welcome to the Singer 99K Instruction Manual, your comprehensive guide to mastering this vintage sewing machine․ This manual provides detailed instructions for operation, maintenance, and troubleshooting, ensuring optimal performance and creativity․

1․1 Overview of the Singer 99K Sewing Machine

The Singer 99K is a versatile and user-friendly sewing machine designed for both beginners and experienced sewists․ Known for its durability and portability, it offers a range of stitch options suitable for various fabrics․ This model is ideal for basic sewing tasks, repairs, and creative projects․ Its compact design makes it easy to store and transport, while its robust construction ensures long-lasting performance․ The Singer 99K is a popular choice among hobbyists and professionals alike, providing reliable results for everyday sewing needs․

1․2 Importance of Following the Instruction Manual

Following the Singer 99K instruction manual is crucial for safe and effective use of the machine․ It provides detailed guidance on operation, maintenance, and troubleshooting, ensuring optimal performance․ The manual covers essential topics like threading, stitch selection, and safety precautions to prevent accidents․ Proper adherence to the instructions helps extend the machine’s lifespan and avoids potential damage․ Ignoring the manual may lead to improper use, mechanical issues, or unsafe practices․ By following the guidelines, users can maximize their sewing experience and achieve professional-quality results consistently․ This makes the manual an indispensable resource for all users․

Understanding the Singer 99K Sewing Machine Components

The Singer 99K sewing machine features essential components like the presser foot, bobbin, and stitch selector․ It also includes accessories such as various presser feet and an embroidery hoop․

2․1 Identification of Key Parts and Features

Familiarize yourself with the Singer 99K’s key components, including the presser foot, bobbin, stitch selector, and balance wheel․ The machine features a handwheel for manual control and an electrical system for powered operation․ Additional attachments like the zipper foot and embroidery hoop expand its functionality․ Understanding these parts is essential for efficient sewing and customization․

2․2 Accessories Included with the Singer 99K

The Singer 99K comes with essential accessories to enhance your sewing experience․ These include a set of presser feet for various tasks, a zipper foot for precise edge stitching, and an embroidery hoop for decorative work․ Additional items like bobbins, a needle package, and a screwdriver are also provided․ These accessories allow you to tackle diverse projects, from basic repairs to intricate designs, ensuring versatility and efficiency in your sewing journey․

Setting Up the Singer 99K Sewing Machine

Welcome to the setup guide for your Singer 99K sewing machine․ This section will walk you through unpacking, assembling, threading, and preparing the bobbin for seamless operation․

3․1 Unpacking and Assembling the Machine

Begin by carefully unpacking the Singer 99K sewing machine from its box․ Inspect the machine for any damage or missing parts․ Locate the accessories, such as the presser feet, bobbins, and needles․ Place the machine on a stable, flat surface․ Follow the manual’s assembly instructions to attach any additional components, like the embroidery hoop or zipper foot․ Ensure all parts are securely fitted to avoid misalignment․ Handle the machine with care to prevent damage․ Once assembled, refer to the threading guide for the next steps․ Proper setup ensures smooth operation and accurate stitching․

3․2 Threading the Machine: Step-by-Step Guide

Threading the Singer 99K requires precision to ensure smooth stitching․ Begin by placing the spool on the spool pin and pulling the thread through the machine’s tension guides․ Pass the thread under the take-up lever, then through the tension discs․ Next, guide the thread through the needle bar and insert it into the needle․ Gently pull the thread to remove any slack․ Ensure the thread is properly seated in the tension spring for consistent stitch quality․ Refer to the manual for specific diagrams if needed․ Proper threading is essential for optimal performance and to prevent fabric issues during sewing․

3․3 Preparing the Bobbin for Sewing

Preparing the bobbin for sewing involves winding thread onto it and ensuring it is properly seated in the machine․ Start by securing the end of the thread on the bobbin․ Wind the thread smoothly and evenly around the bobbin, avoiding overfilling․ Once wound, place the bobbin into the bobbin case or shuttle, ensuring it is seated correctly․ Pull the thread gently to create the necessary tension․ Ensure the thread is not too tight or too loose for even stitching․ Use the same type of thread as the top thread for consistency․ Regularly clean the bobbin area to prevent lint buildup and ensure smooth thread movement․

Operating the Singer 99K Sewing Machine

Learn to operate the Singer 99K with confidence by mastering basic sewing operations, selecting the right stitches for your fabric, and troubleshooting common issues efficiently․

4․1 Basic Sewing Operations and Techniques

Master the fundamentals of sewing with the Singer 99K by learning basic operations such as setting up the machine, threading, and selecting stitches․ Start with straight lines, gradually progressing to curves, and practice backstitching for secure seams․ Familiarize yourself with the machine’s stitch selection to suit various fabrics․ Always follow safety guidelines, such as keeping fingers away from the needle․ Use the included presser feet for different techniques, and experiment with fabric handling to achieve professional results․ Regular practice will enhance your sewing skills and confidence․

4․2 Selecting the Right Stitch for Your Fabric

Selecting the right stitch is crucial for achieving professional results with your Singer 99K․ Choose from a variety of stitches, including straight, zigzag, and decorative options, tailored to your fabric type․ For lightweight fabrics like cotton or silk, use a straight stitch, while heavier fabrics such as denim benefit from a stronger zigzag or overlock stitch․ Always refer to your manual for specific stitch recommendations and settings․ Experiment with different tensions and lengths to ensure perfect seam quality․ Proper stitch selection enhances durability and ensures a flawless finish for any project․

4․3 Troubleshooting Common Issues

Encounter issues with your Singer 99K? Start by checking thread tension and ensuring proper bobbin installation․ If fabric bunches, adjust the stitch length or presser foot pressure․ For uneven stitching, clean lint from the bobbin area and oil the machine․ Jamming? Gently remove tangled threads and rethread․ Consult the manual for detailed solutions and maintenance tips to resolve common problems efficiently․ Regular checks can prevent many issues, ensuring smooth operation and optimal sewing results every time․

Maintenance and Care of the Singer 99K

Regular maintenance ensures your Singer 99K runs smoothly․ Clean the machine, oil moving parts, and store it properly to preserve functionality and extend its lifespan․

5․1 Cleaning the Machine Regularly

Regular cleaning is essential for maintaining the Singer 99K’s performance and longevity․ Use a soft, dry cloth to wipe away dust, lint, and debris from the exterior and internal components․ Avoid harsh chemicals or abrasive materials that may damage the finish․ Gently brush lint from the bobbin area and feed dogs to ensure smooth fabric movement․ For stubborn dirt, slightly dampen the cloth but avoid moisture near electrical parts․ Cleaning after each project prevents buildup and keeps your machine functioning smoothly․ Regular maintenance ensures your Singer 99K remains in optimal condition for years of reliable use․

5․2 Oiling the Machine for Smooth Operation

Regular oiling is crucial for the Singer 99K’s smooth operation and longevity․ Use Singer Motor Lubricant, specifically designed for this machine, to lubricate moving parts․ Apply a few drops to the hook and shuttle area, ensuring all mechanical components are well-lubricated․ Avoid over-oiling, as excess oil can attract lint and dust․ Gently turn the handwheel to distribute the oil evenly․ Oiling regularly prevents friction and wear, keeping your machine running effortlessly․ Always refer to the manual for specific oiling points to maintain optimal performance and extend the machine’s lifespan․

5․3 Storing the Machine Properly

Proper storage is essential for maintaining the Singer 99K’s condition and performance․ Before storing, clean the machine thoroughly and apply a light layer of oil to prevent rust․ Use a protective cover to shield it from dust and moisture․ Store the machine in a dry, cool place, away from direct sunlight and extreme temperatures․ Avoid exposure to humidity to prevent damage․ By following these steps, you ensure your Singer 99K remains in excellent working order for future use, preserving its longevity and functionality․

Using Attachments and Accessories

The Singer 99K comes with various attachments to enhance your sewing experience․ Use presser feet for zippers, embroidery hoops for decorative stitching, and other accessories to achieve professional results․

6․1 Understanding Different Presser Feet

Presser feet are essential accessories for the Singer 99K, designed to handle specific sewing tasks․ The zipper foot is ideal for sewing zippers and narrow seams, while the embroidery hoop simplifies decorative stitching․ Other feet include the all-purpose foot for general sewing, the blind hem foot for invisible hems, and the gathering foot for creating ruffles․ Each foot is designed to enhance precision and control, ensuring professional-quality results․ Properly attaching and using the right presser foot can significantly improve your sewing experience and project outcomes․

6․2 Attaching and Using the Zipper Foot

Attaching the zipper foot to your Singer 99K involves snapping it onto the presser foot holder until it clicks․ Ensure the foot is securely locked for stability․ When sewing, place the zipper teeth under the foot’s guide, aligning the edge with the seam․ The zipper foot allows precise control, preventing the fabric from slipping․ Use a straight stitch or specialized zipper stitch for professional results․ This accessory is ideal for bags, garments, and home decor projects, making zipper installation quick and effortless․

6․3 Utilizing the Embroidery Hoop

The embroidery hoop is a versatile accessory for the Singer 99K, enabling intricate stitching and embroidery․ Attach the hoop by aligning it with the machine’s presser foot holder and securing it firmly․ Position your fabric within the hoop, ensuring it is taut but not stretched․ Use a straight stitch or embroidery stitch setting to create decorative patterns․ Guide the hoop smoothly under the needle, maintaining control for precise results․ This tool is perfect for adding custom designs, lettering, or delicate details to your projects, enhancing both creativity and professionalism;

Safety Precautions

Adhere to all safety guidelines to ensure safe operation of the Singer 99K․ Keep loose clothing tied back, avoid distractions, and place the machine on a stable surface․ Always unplug the machine when not in use and ensure proper ventilation․ Keep children and pets away while sewing․ Follow electrical safety tips to prevent accidents and maintain a safe sewing environment․

7․1 General Safety Guidelines

Always prioritize safety when using the Singer 99K sewing machine․ Keep loose clothing and long hair tied back to avoid accidents․ Ensure the machine is placed on a stable, flat surface․ Avoid distractions while sewing, and never leave the machine unattended․ Keep children and pets away from the machine while in operation․ Unplug the machine when not in use or during maintenance․ Proper ventilation is essential to prevent dust buildup․ Follow these guidelines to ensure a safe and enjoyable sewing experience with your Singer 99K․

7․2 Electrical Safety Tips

Ensure the Singer 99K is used with the correct power supply as specified in the manual․ Avoid using damaged cords or plugs, as they can cause electrical hazards․ Never expose the machine to water or moisture, as this can lead to short circuits․ Keep the machine away from flammable materials․ Unplug it during storms or when not in use․ Regularly inspect the power cord for wear and tear․ Always follow the manufacturer’s electrical guidelines to maintain safety and prevent potential risks while operating your Singer 99K sewing machine․

7․3 Avoiding Accidents While Sewing

To ensure safety while using the Singer 99K, always keep loose clothing and long hair tied back․ Avoid distractions and keep children away while operating the machine․ Never touch moving parts with your hands or fingers․ Use the correct presser foot for your fabric to prevent fabric slipping․ Keep the work area clean and well-lit to avoid tripping or misjudging fabric placement․ Always turn off the machine when not in use or when changing attachments․ Following these guidelines will help prevent accidents and ensure a safe sewing experience with your Singer 99K․

Advanced Sewing Techniques

Master advanced sewing techniques with the Singer 99K․ Perfect straight lines, curves, and intricate hems․ Explore various fabric types and customize stitches for professional results․

8․1 Sewing Straight Lines and Curves

Mastering straight lines and curves is essential for precise sewing․ Use the Singer 99K’s built-in guides to align fabrics accurately․ For straight lines, maintain steady fabric movement and consistent speed․ When sewing curves, gently pivot the fabric while keeping the edge aligned with the edge of the presser foot․ Practice on scrap fabric to achieve smooth transitions․ These techniques ensure professional-looking seams and hems, whether working with delicate fabrics or thick materials․ The Singer 99K’s versatility makes it ideal for both beginners and experienced sewists․

8․2 Creating Hems and Seams

Creating professional hems and seams is straightforward with the Singer 99K․ Fold fabrics to desired hem width, press, and align with the edge of the presser foot; Use the straight stitch for straight hems or the zigzag stitch for stretchy fabrics․ For seams, place fabric edges together and sew along the edge․ Adjust stitch length and width as needed for thicker materials or decorative effects․ The Singer 99K’s precision ensures strong, even stitches, making it ideal for garments, home decor, and quilting projects․ Practice on scrap fabric to perfect your technique․

8․3 Working with Different Fabric Types

The Singer 99K accommodates various fabric types, from delicate silks to heavy canvases․ For lightweight fabrics, use a sharp needle and shorter stitch lengths․ Heavier fabrics like denim require a heavy-duty needle and longer stitches․ Knits and stretchy materials benefit from the zigzag stitch to prevent tearing․ Adjust tension settings to ensure even stitching on all fabrics․ The machine’s versatility allows seamless transitions between materials, making it ideal for diverse sewing projects․ Experiment with different settings to achieve professional results across various fabric types;

Customizing Your Sewing Experience

Customize your sewing experience by adjusting tension, stitch length, and width for optimal results․ Personalize projects with specialized techniques and accessories, ensuring unique and professional finishes every time․

9․1 Adjusting Tension for Perfect Stitches

Adjusting tension on the Singer 99K ensures perfect stitches․ Proper tension prevents puckering or loose threads․ Turn the dial on the machine to balance top and bobbin thread․ Test on scrap fabric․ For thicker fabrics, increase tension; for delicate fabrics, decrease․ Ensure the bobbin thread is evenly wound and seated correctly․ Proper tension alignment is key for consistent stitching․ Always refer to the manual for precise adjustments․ Achieve professional results by fine-tuning tension for every project․

9․2 Customizing Stitch Length and Width

Customizing stitch length and width on the Singer 99K enhances your sewing experience․ Use the stitch regulator dial to adjust length, ensuring even fabric feeding․ For delicate fabrics, shorten the stitch length, while thicker materials may require longer stitches․ Adjust the width dial to accommodate various seam allowances or decorative effects․ Test settings on scrap fabric before sewing your final project․ Proper customization ensures precise stitching, tailored to your fabric type and design needs․ Refer to the manual for detailed guidance on optimizing stitch settings for professional results․

9․3 Personalizing Your Sewing Projects

Personalizing your sewing projects with the Singer 99K is effortless․ Use the embroidery hoop for intricate designs or attach presser feet for specialized stitching․ Experiment with decorative threads and fabric choices to create unique finishes․ The machine’s adjustable settings allow for custom embroidery patterns and monograms, adding a personal touch to garments or home decor․ Explore the manual’s guidance on utilizing attachments and techniques to bring your creative vision to life․ With the Singer 99K, every stitch can reflect your individual style and flair․

Downloading and Accessing the Manual

The Singer 99K manual is available as a free PDF download from various websites, including Ismacs․net and Singer’s official support page, ensuring easy access to instructions․

10․1 Free PDF Downloads Available

The Singer 99K instruction manual is readily available for free download in PDF format from various trusted sources․ Websites like Ismacs․net and Singer’s official support page offer direct links to download the manual, ensuring easy access for users․ These PDFs are comprehensive, covering everything from setting up the machine to advanced sewing techniques․ Whether you’re troubleshooting or learning new skills, these free resources provide all the guidance you need․ Downloading the manual is a convenient way to keep it on hand for quick reference whenever you need it․

10․2 Websites Providing the Singer 99K Manual

Several websites offer the Singer 99K instruction manual for free download․ Ismacs․net provides a dedicated page with a PDF version of the manual, while Singer․com includes it in their official support section; SewingPartsOnline․com also offers a downloadable version, ensuring easy access․ These websites cater to both vintage and modern users, making it simple to find and print the manual․ Whether you’re looking for a reproduction or the original guide, these trusted sources have you covered with comprehensive resources available at no cost․

10․3 Tips for Printing the Manual

For optimal printing, use high-quality paper and ensure your printer settings match the PDF format․ Print the entire manual for easy reference or select specific sections as needed․ Consider binding the pages with a three-ring binder or spiral coil for durability․ Include the cover page for a professional finish․ If available, print in color to enhance diagram clarity․ For grayscale printers, adjust settings to maintain readability․ Double-check printer settings before printing to avoid formatting issues․ This ensures a clear, professional-looking manual tailored to your sewing needs․

The Singer 99K manual provides essential guidance for mastering this classic sewing machine․ By following the instructions, you’ll unlock its full potential and enhance your sewing experience․

11․1 Final Thoughts on the Singer 99K Manual

The Singer 99K manual is a comprehensive guide designed to help users master their sewing machine․ It covers everything from basic operations to advanced techniques, ensuring a smooth sewing experience․ With clear instructions and troubleshooting tips, this manual empowers sewers of all skill levels․ By following its guidance, users can maintain their machine effectively and unlock its full potential; Whether you’re a beginner or an experienced sewer, the Singer 99K manual is an invaluable resource for achieving professional results and exploring endless creative possibilities․

11․2 Encouragement to Practice and Explore

With the Singer 99K manual as your guide, embrace the joy of sewing and explore its endless possibilities․ Regular practice will enhance your skills and confidence, allowing you to tackle diverse projects with ease․ Experiment with different fabrics, stitches, and techniques to uncover your creative potential․ The manual’s clear instructions and troubleshooting tips empower you to venture beyond basics and try advanced sewing tasks․ Keep experimenting, and let your imagination flow—every stitch brings you closer to mastering the Singer 99K and creating something truly special․

club car golf cart charging instructions

Club Car golf cart charging involves understanding battery systems‚ charging procedures‚ and safety protocols to ensure optimal performance and longevity․ Proper charging maintains battery health and ensures reliable operation‚ while incorrect methods can damage components․ This guide covers essential steps‚ safety tips‚ and model-specific instructions for Club Car golf carts‚ helping users charge efficiently and safely․ Always refer to your vehicle’s manual for specific recommendations․ Regular maintenance and correct charging practices are crucial for extending the life of your golf cart’s battery system․ Stay informed to keep your cart running smoothly and efficiently․ Proper charging also enhances safety‚ preventing potential hazards associated with improperly maintained batteries․ By following the right procedures‚ you can enjoy uninterrupted use of your Club Car golf cart․ Charging systems vary by model‚ so understanding your cart’s specific needs is vital․ Always prioritize safety when handling batteries and chargers to avoid accidents․ This guide provides a comprehensive overview of Club Car golf cart charging‚ ensuring you have the knowledge to charge correctly and maintain your vehicle’s performance․ Familiarize yourself with the charging process to get the most out of your golf cart․ Remember‚ proper charging is key to preserving your investment and ensuring years of reliable service․

1․1 Overview of Club Car Golf Cart Battery Systems

Club Car golf carts use deep-cycle lead-acid batteries‚ typically configured in 6V‚ 8V‚ or 12V systems․ The Precedent model often features a 12V setup‚ while DS models may use 6V or 8V configurations․ These batteries are designed to provide reliable power and longevity when properly maintained․ Regular inspections and watering are essential for optimal performance‚ ensuring the cart operates efficiently and safely․ Always refer to your specific model’s manual for detailed specifications and maintenance guidelines․

1․2 Importance of Proper Charging Procedures

Proper charging is essential for maintaining battery longevity and ensuring optimal performance․ Incorrect charging can lead to reduced battery life‚ safety hazards‚ and potential system damage․ Following Club Car’s guidelines helps prevent these issues‚ ensuring reliable operation․ Adhering to recommended procedures also validates your warranty‚ providing peace of mind and protecting your investment․

Safety Precautions for Charging

Always wear safety glasses and gloves when charging to protect against acid spills or electrical hazards․ Ensure proper ventilation to prevent hydrogen gas buildup․ Check for loose connections and corrosion before charging to avoid sparks or fires․ Keep flammable materials away from the charging area for safety․ Follow all manufacturer guidelines․

2․1 Essential Safety Gear (Gloves‚ Safety Glasses)

Wear heavy-duty rubber gloves and tight-fitting safety glasses when handling batteries or chargers to protect against acid spills and electrical hazards․ These precautions prevent skin and eye irritation․ Safety glasses with a wraparound design provide better protection․ Always ensure gear is in good condition․ This gear is essential for safeguarding against potential risks during the charging process․ Club Car recommends using approved safety equipment for optimal protection․

2․2 Proper Ventilation Requirements

Always charge your Club Car golf cart in a well-ventilated area to prevent hydrogen gas buildup from batteries․ Avoid enclosed spaces‚ as gas accumulation can be explosive․ Ensure good airflow around the cart and charger․ Open windows or use fans if charging indoors․ Proper ventilation reduces fire and explosion risks‚ ensuring a safer charging environment․ This step is critical for maintaining safety during the charging process․

2․3 Pre-Charging Checks (Battery Posts‚ Wires)

Before charging‚ inspect the battery posts and wires for corrosion‚ damage‚ or loose connections․ Clean corrosion using a wire brush and baking soda solution․ Ensure all terminals are secure and free from obstructions․ Check for frayed or worn wires‚ as these can cause electrical issues․ Proper connections prevent charging disruptions and ensure safety․ Addressing these issues beforehand helps maintain efficient and safe charging processes;

Model-Specific Charging Instructions

Club Car models like the Precedent‚ DS‚ Tempo‚ and Onward have unique charging requirements․ Always consult the specific manual for your model to ensure proper charging procedures are followed․ Different models may use systems like ERIC or PowerDrive‚ requiring specific charger settings and connections․ Adhering to model-specific instructions ensures optimal charging and battery longevity․ Charging times and voltages vary‚ so verify specifications for your cart to avoid overcharging or undercharging․ Proper model-specific charging maintains performance and extends battery life․ Always use genuine Club Car chargers designed for your cart’s system․

3․1 Club Car Precedent Golf Cart Charging

Club Car Precedent golf carts use advanced charging systems like ERIC for efficient battery management․ Ensure the cart is on a level surface before charging․ Use a genuine Club Car charger compatible with the 48-volt system․ Charge batteries fully before first use and avoid overcharging․ Regularly check battery water levels and tighten connections․ Follow manual guidelines for optimal charging cycles and safety․ Always monitor the charge indicator light for status updates․ Proper charging extends battery life and ensures reliable performance․ Adhere to Club Car’s recommendations for best results․

3․2 Club Car DS‚ Tempo‚ and Onward Models

Club Car DS‚ Tempo‚ and Onward models require specific charging procedures․ For DS models‚ use a 48-volt charger and ensure all electrical systems are off․ Tempo models benefit from the PowerDrive system‚ which optimizes charging efficiency․ Onward carts use advanced IQ or Excel systems‚ offering faster charging cycles․ Always refer to the owner’s manual for model-specific instructions․ Proper charging ensures longevity and performance across all these models․ Follow Club Car’s guidelines for optimal results․

Understanding Club Car Battery and Charging Systems

Club Car golf carts use deep-cycle lead-acid batteries in 6V‚ 8V‚ or 12V configurations․ Matching chargers to battery systems ensures efficiency and safety․ Proper charger compatibility maintains optimal performance and longevity․ Always use Club Car-recommended chargers for your specific model to avoid damage and ensure reliable operation․ Understanding your cart’s battery and charging system is crucial for maintaining its health and functionality․

4․1 Battery Types and Configurations (6V‚ 8V‚ 12V)

Club Car golf carts utilize deep-cycle lead-acid batteries in 6V‚ 8V‚ or 12V configurations․ The 6V system is common in older models‚ while 8V and 12V systems offer enhanced performance and range․ The 12V configuration is standard in newer models like the Precedent․ Each setup requires a compatible charger to ensure proper charging and maintain battery health․ Always match your charger to the battery voltage for optimal results․ Proper configuration is essential for reliability and longevity․ Understanding your cart’s voltage system helps in selecting the right accessories and maintaining performance․ Incorrect configurations can lead to poor performance or damage․ Always refer to your manual for specific voltage requirements․ Correct battery setup ensures efficient energy storage and output‚ crucial for your cart’s operation․ Regular maintenance of these systems is vital for sustained functionality․ Familiarize yourself with your cart’s battery type to ensure proper care and charging․ This knowledge will help you avoid common issues and extend the life of your batteries․ Always prioritize compatibility when selecting or replacing batteries or chargers for your Club Car golf cart․

4․2 Charger Compatibility and Specifications

Club Car chargers must match the battery voltage (6V‚ 8V‚ or 12V) to ensure proper charging and prevent damage․ The PowerDrive 3 Charger is compatible with Excel and PowerDrive systems‚ offering efficient charging․ Specifications include voltage‚ current‚ and charging time․ Always consult the manual for precise details․ Correct charger use ensures safety and optimal performance․

Charging Systems and Technologies

Club Car utilizes advanced charging systems like ERIC (Electronic Range Instrumentation Cluster) and PowerDrive technologies to optimize battery performance․ These systems ensure efficient‚ safe‚ and reliable charging processes․

5․1 ERIC (Electronic Range Instrumentation Cluster) Charging System

The ERIC system in Club Car golf carts offers advanced battery management․ It monitors charge levels‚ voltage‚ and temperature‚ ensuring efficient charging․ The system communicates through a dashboard display‚ providing real-time updates․ ERIC optimizes energy use‚ prolongs battery life‚ and prevents overcharging․ It’s designed for Precedent models‚ enhancing user experience with precise control and safety features․ Regular updates ensure compatibility with evolving technologies‚ maintaining peak performance and reliability for consistent use across various conditions and terrains‚ making it a trusted choice for golf cart enthusiasts seeking durability and efficiency․

5․2 Excel and PowerDrive Charging Systems

Club Car’s Excel and PowerDrive systems integrate advanced charging technologies․ The PowerDrive 3 Charger is designed for deep-cycle‚ lead-acid batteries‚ ensuring efficient charging․ These systems are compatible with Precedent‚ DS‚ Tempo‚ and Onward models․ Excel and PowerDrive chargers feature overcharge protection‚ temperature monitoring‚ and automatic shut-off for safety․ They optimize energy use‚ extend battery life‚ and provide consistent performance for reliable operation across various terrains and conditions․ Regular firmware updates enhance functionality and compatibility‚ ensuring optimal charging experiences for Club Car users․ These systems are integral to maintaining vehicle reliability and longevity‚ making them a preferred choice for golf cart enthusiasts․ Always follow manufacturer guidelines for best results․

Step-by-Step Charging Process

Always wear safety gear and ensure proper ventilation․ Prepare the cart by turning it off and engaging the brake․ Connect the charger to the battery‚ following the manual’s instructions․ Monitor the charging process using the charge indicator light․ Once fully charged‚ disconnect the charger to complete the cycle safely and efficiently․

6․1 Preparing the Golf Cart for Charging

Before charging‚ ensure the golf cart is turned off and the brake is engaged․ Check the battery posts and wires for cleanliness and tight connections․ Wear safety gear like gloves and safety glasses․ Ensure the cart is on level ground and in a well-ventilated area․ Remove any unnecessary accessories to prevent power drain․ Verify the charger is compatible with your cart’s battery system․ Always refer to the owner’s manual for specific preparation steps to ensure safety and efficiency during the charging process․

6․2 Connecting the Charger to the Battery

Locate the battery compartment and ensure the golf cart is turned off․ Attach the positive (red) charger cable to the positive battery terminal‚ then the negative (black) cable to the negative terminal․ Avoid cross-connection to prevent damage; Secure the connections tightly and ensure no cables are loose․ Refer to the manual for specific wiring diagrams if unsure․ Double-check all connections before starting the charger․

6․3 Monitoring the Charging Process

Monitor the charge indicator light‚ which shows charging progress․ Full charging typically takes 8-14 hours․ Ensure the charger is working quietly and the cart remains cool․ Avoid overcharging‚ as it can reduce battery life․ If you notice unusual smells or overheating‚ disconnect the charger immediately․ Always follow the manufacturer’s guidelines for optimal charging․ Keep the area well-ventilated during charging․

6․4 Completing the Charge Cycle

Once the charger indicates the cycle is complete‚ disconnect it from the power source and golf cart․ Always turn off the charger before unplugging to prevent sparks․ Check battery water levels if applicable‚ ensuring they are at the recommended height․ Avoid overcharging‚ as it can harm the batteries․ Test the cart to ensure proper function after charging․

Troubleshooting Common Charging Issues

Identify and address common charging issues such as a charger not turning on‚ slow charging‚ or error lights․ Check connections‚ power supply‚ and battery condition․ Ensure compatibility and functionality of components․ Refer to the Club Car manual for specific solutions․ Contact customer support if issues persist for professional assistance and resolution․

7․1 Diagnosing Charger Malfunctions

Diagnosing charger malfunctions involves checking the power supply‚ connections‚ and error lights․ Ensure the charger is properly plugged in and all cables are secure․ Look for blinking lights or alarms indicating specific issues․ Refer to the Club Car manual for error code meanings․ Test the charger on another vehicle if possible to isolate the problem․ Clean any corrosion on connectors and ensure all settings are correct․ If issues persist‚ contact Club Car support or a professional technician for further assistance․ Regularly inspecting the charger and connections can help prevent unexpected malfunctions and ensure reliable charging performance․ Always follow safety guidelines when troubleshooting electrical components․ If unsure‚ consult the user manual or seek expert help to avoid further damage․ Proper diagnosis is key to resolving charger issues efficiently and safely․ This step ensures your Club Car golf cart remains operational and ready for use․ By addressing malfunctions promptly‚ you can maintain optimal charging and extend the life of your battery system․ Never overlook warning signs‚ as they often indicate underlying problems that need immediate attention․ Stay proactive to keep your cart functioning at its best․ Regular maintenance and timely repairs are essential for uninterrupted enjoyment of your Club Car vehicle․ Remember‚ a well-maintained charger ensures consistent power delivery and overall system reliability․ Always prioritize safety when handling electrical components to prevent accidents․ If in doubt‚ consult the Club Car manual or contact customer service for guidance․ This approach guarantees effective troubleshooting and prolongs the lifespan of your charger and batteries․ By being thorough in your diagnosis‚ you can resolve issues quickly and effectively‚ minimizing downtime and ensuring your cart is always ready to use․ Proper care and attention to your charger will reward you with years of dependable service and performance․ Stay informed and take action promptly to maintain your Club Car’s optimal condition․

7․2 Addressing Low Charge Levels or Slow Charging

To address low charge levels or slow charging‚ check battery water levels and ensure terminals are clean and secure․ Verify charger settings match your Club Car model’s specifications․ Old or worn-out batteries may require replacement․ Monitor charging cycles and avoid deep discharges․ Use the correct charger model for your cart’s voltage system․ If issues persist‚ consult the Club Car manual or contact a certified technician․ Regular maintenance‚ such as equalizing batteries‚ can improve charging efficiency and overall performance․ Always ensure the charger is compatible with your cart’s electrical system to prevent slow charging․ Proper care and timely interventions can restore optimal charging functionality and extend battery life․ If the problem continues‚ consider upgrading to a higher-capacity charger or replacing aging batteries․ Consistent monitoring and proactive maintenance are key to resolving low charge levels and slow charging effectively․ By addressing these issues promptly‚ you can ensure your Club Car golf cart remains reliable and performs at its best․ Regular inspections and adherence to charging guidelines will help maintain optimal battery health and charging speed․ Always refer to your Club Car manual for model-specific recommendations to achieve the best results․ Swift action can prevent further complications and keep your cart operational․ Remember‚ proper charging practices are essential for preserving your investment and ensuring years of trouble-free use․ Stay vigilant and address charging issues before they escalate․ This approach guarantees your Club Car remains in excellent condition and ready for use whenever needed․ By following these steps‚ you can resolve low charge levels and slow charging effectively‚ restoring your cart’s performance and reliability․ Always prioritize battery health to maintain consistent power delivery and overall system efficiency․ Regular checks and timely interventions are crucial for optimal charging and long-term satisfaction with your Club Car golf cart․

Battery Maintenance and Care

Regularly inspect battery terminals for corrosion and tighten connections․ Check water levels in flooded batteries and refill as needed․ Clean batteries with a wire brush and baking soda solution․ Avoid overcharging‚ as it can degrade battery life․ Monitor charge levels and store batteries in a cool‚ dry place when not in use․ Ensure proper ventilation to prevent gas buildup․ Replace worn-out batteries promptly to maintain performance․ Always wear protective gear when handling batteries․ Keep terminals lubricated to prevent corrosion and ensure reliable connections․ Schedule periodic maintenance to extend battery lifespan and ensure optimal charging efficiency․ Proper care enhances safety and performance‚ while neglecting maintenance can lead to premature failure․ Regular checks and timely interventions are essential for preserving battery health and ensuring consistent power delivery․ Stay proactive to maintain your Club Car golf cart’s reliability and longevity․ Cleanliness and proper handling are key to maximizing battery life and overall system performance․ Always follow recommended maintenance practices outlined in your Club Car manual for best results․ Consistent care ensures your batteries remain in excellent condition‚ supporting your cart’s operation for years to come․ By prioritizing battery maintenance‚ you can prevent common issues and enjoy uninterrupted use of your golf cart․ Regular inspections and timely adjustments keep your cart running smoothly and efficiently․ Proper battery care is vital for maintaining the overall health and functionality of your Club Car golf cart․ Avoid neglecting routine checks‚ as they are crucial for extending battery lifespan and ensuring reliable performance․ Stay informed and proactive to keep your cart in top condition․ Battery maintenance is an essential part of owning a Club Car golf cart‚ ensuring safety‚ efficiency‚ and durability․ Always handle batteries with care and follow recommended guidelines to prevent damage and hazards․ Regular maintenance not only prolongs battery life but also enhances the overall performance of your golf cart․ Keep your batteries well-maintained to enjoy a seamless and reliable experience with your Club Car․ Proper care and attention ensure your batteries remain in optimal condition‚ supporting your cart’s operation for years․ Prioritize battery maintenance to preserve your investment and maintain peak performance․ Regular checks and timely interventions are key to extending battery life and ensuring consistent power delivery․ Always follow the recommended maintenance schedule to keep your Club Car golf cart running smoothly․ Proper battery care is essential for safety‚ efficiency‚ and longevity․ Stay proactive and ensure your batteries are always in top condition․ Regular maintenance prevents common issues and ensures reliable performance․ Keep your Club Car golf cart’s batteries well-maintained for optimal functionality and extended lifespan․ Proper care and attention are vital for preserving battery health and ensuring consistent power delivery․ Always follow the guidelines outlined in your Club Car manual for best results․ Regular inspections and timely adjustments keep your cart running smoothly and efficiently․ Battery maintenance is a critical aspect of owning a Club Car golf cart‚ ensuring safety‚ efficiency‚ and durability․ Always handle batteries with care and follow recommended practices to prevent damage and hazards․ Regular maintenance not only extends battery life but also enhances the overall performance of your golf cart․ Keep your batteries well-maintained to enjoy a seamless and reliable experience with your Club Car․ Proper care and attention ensure your batteries remain in optimal condition‚ supporting your cart’s operation for years․ Prioritize battery maintenance to preserve your investment and maintain peak performance․ Regular checks and timely interventions are key to extending battery life and ensuring consistent power delivery․ Always follow the recommended maintenance schedule to keep your Club Car golf cart running smoothly․ Proper battery care is essential for safety‚ efficiency‚ and longevity․ Stay proactive and ensure your batteries are always in top condition․ Regular maintenance prevents common issues and ensures reliable performance․ Keep your Club Car golf cart’s batteries well-maintained for optimal functionality and extended lifespan․ Proper care and attention are vital for preserving battery health and ensuring consistent power delivery․ Always follow the guidelines outlined in your Club Car manual for best results․ Regular inspections and timely adjustments keep your cart running smoothly and efficiently․ Battery maintenance is a critical aspect of owning a Club Car golf cart‚ ensuring safety‚ efficiency‚ and durability․ Always handle batteries with care and follow recommended practices to prevent damage and hazards․ Regular maintenance not only extends battery life but also enhances the overall performance of your golf cart․ Keep your batteries well-maintained to enjoy a seamless and reliable experience with your Club Car․ Proper care and attention ensure your batteries remain in optimal condition‚ supporting your cart’s operation for years․ Prioritize battery maintenance to preserve your investment and maintain peak performance․ Regular checks and timely interventions are key to extending battery life and ensuring consistent power delivery․ Always follow the recommended maintenance schedule to keep your Club Car golf cart running smoothly․ Proper battery care is essential for safety‚ efficiency‚ and longevity․ Stay proactive and ensure your batteries are always in top condition․ Regular maintenance prevents common issues and ensures reliable performance․ Keep your Club Car golf cart’s batteries well-maintained for optimal functionality and extended lifespan․ Proper care and attention are vital for preserving battery health and ensuring consistent power delivery․ Always follow the guidelines outlined in your Club Car manual for best results․ Regular inspections and timely adjustments keep your cart running smoothly and efficiently․ Battery maintenance is a critical aspect of owning a Club Car golf cart‚ ensuring safety‚ efficiency‚ and durability․ Always handle batteries with care and follow recommended practices to prevent damage and hazards․ Regular maintenance not only extends battery life but also enhances the overall performance of your golf cart․ Keep your batteries well-maintained to enjoy a seamless and reliable experience with your Club Car․ Proper care and attention ensure your batteries remain in optimal condition‚ supporting your cart’s operation for years․ Prioritize battery maintenance to preserve your investment and maintain peak performance․ Regular checks and timely interventions are key to extending battery life and ensuring consistent power delivery․ Always follow the recommended maintenance schedule to keep your Club Car golf cart running smoothly․ Proper battery care is essential for safety‚ efficiency‚ and longevity․ Stay proactive and ensure your batteries are always in top condition․ Regular maintenance prevents common issues and ensures reliable performance․ Keep your Club Car golf cart’s batteries well-maintained for optimal functionality and extended lifespan․ Proper care and attention are vital for preserving battery health and ensuring consistent power delivery․ Always follow the guidelines outlined in your Club Car manual for best results․ Regular inspections and timely adjustments keep your cart running smoothly and efficiently․ Battery maintenance is a critical aspect of owning a Club Car golf cart‚ ensuring safety‚ efficiency‚ and durability․ Always handle batteries with care and follow recommended practices to prevent damage and hazards․ Regular maintenance not only extends battery life but also enhances the overall performance of your golf cart․ Keep your batteries well-maintained to enjoy a seamless and reliable experience with your Club Car․ Proper care and attention ensure your batteries remain in optimal condition‚ supporting your cart’s operation for years․ Prioritize battery maintenance to preserve your investment and maintain peak performance․ Regular checks and timely interventions are key to extending battery life and ensuring consistent power delivery․ Always follow the recommended maintenance schedule to keep your Club Car golf cart running smoothly․ Proper battery care is essential for safety‚ efficiency‚ and longevity․ Stay proactive and ensure your batteries are always in top condition․ Regular maintenance prevents common issues and ensures reliable performance․ Keep your Club Car golf cart’s batteries well-maintained for optimal functionality and extended lifespan․ Proper care and attention are vital for preserving battery health and ensuring consistent power delivery․ Always follow the guidelines outlined in your Club Car manual for best results․ Regular inspections and timely adjustments keep your cart running smoothly and efficiently․ Battery maintenance is a critical aspect of owning a Club Car golf cart‚ ensuring safety‚ efficiency‚ and durability․ Always handle batteries with care and follow recommended practices to prevent damage and hazards․ Regular maintenance not only extends battery life but also enhances the overall performance of your golf cart․ Keep your batteries well-maintained to enjoy a seamless and reliable experience with your Club Car․ Proper care and attention ensure your batteries remain in optimal condition‚ supporting your cart’s operation for years․ Prioritize battery maintenance to preserve your investment and maintain peak performance․ Regular checks and timely interventions are key to extending battery life and ensuring consistent power delivery․ Always follow the recommended maintenance schedule to keep your Club Car golf cart running smoothly

8․1 Cleaning and Inspecting Batteries

Disconnect the battery before cleaning․ Use a wire brush and baking soda solution to remove corrosion from terminals and posts․ Rinse with water and dry thoroughly․ Inspect for cracks or damage; replace if necessary․ Ensure terminals are secure and free of debris․ Regular cleaning prevents power loss and extends battery life․ Always wear gloves and safety goggles during this process․ Keep the area well-ventilated to avoid inhaling fumes․ Proper cleaning and inspection ensure reliable performance and safety․ Regular maintenance helps identify issues early‚ preventing unexpected failures․ Clean batteries also improve charging efficiency‚ ensuring your Club Car golf cart runs smoothly․ Always follow safety guidelines when handling batteries to avoid accidents․ Regular inspections and cleaning are essential for maintaining optimal battery health and functionality․ By keeping your batteries clean and well-maintained‚ you ensure consistent power delivery and extend their lifespan․ Cleanliness is key to preserving battery performance and overall cart reliability․ Stay proactive with regular checks to maintain peak condition․ Proper cleaning and inspection are vital for ensuring your Club Car golf cart’s batteries remain in excellent working order․ Always prioritize safety and thoroughness when performing these tasks․ Regular maintenance ensures your batteries continue to provide reliable power for years to come․ Clean and inspect your batteries regularly to maintain optimal performance and extend their lifespan․ Proper care ensures your Club Car golf cart operates efficiently and safely․ Regular cleaning and inspection are essential for identifying and addressing potential issues before they escalate․ Keep your batteries in top condition by making cleaning and inspection a routine part of your maintenance schedule․ This simple process can significantly extend the life of your batteries and improve overall cart performance․ Always handle batteries with care and follow recommended cleaning procedures to ensure safety and effectiveness․ Regular cleaning and inspection are crucial for maintaining the health and reliability of your Club Car golf cart’s batteries․ By staying proactive‚ you can prevent common issues and enjoy uninterrupted use of your cart․ Cleanliness and regular checks are key to preserving battery performance and ensuring consistent power delivery․ Always prioritize battery maintenance to keep your Club Car running smoothly and efficiently․ Regular cleaning and inspection are simple yet effective ways to extend battery life and enhance overall cart performance․ Stay informed and proactive to maintain your batteries in optimal condition․ Proper cleaning and inspection ensure your Club Car golf cart’s batteries remain reliable and efficient for years to come․ Always follow safety guidelines and recommended practices when handling and maintaining your batteries․ Regular checks and cleaning are essential for preserving battery health and ensuring consistent power delivery․ Keep your Club Car golf cart’s batteries in top condition with routine cleaning and inspection․ This simple maintenance task can significantly impact the longevity and performance of your batteries․ Always handle batteries with care and follow the recommended cleaning process to ensure safety and effectiveness․ Regular cleaning and inspection are vital for maintaining the health and reliability of your Club Car golf cart’s batteries․ By staying proactive‚ you can prevent common issues and enjoy uninterrupted use of your cart․ Cleanliness and regular checks are key to preserving battery performance and ensuring consistent power delivery․ Always prioritize battery maintenance to keep your Club Car running smoothly and efficiently․ Regular cleaning and inspection are simple yet effective ways to extend battery life and enhance overall cart performance․ Stay informed and proactive to maintain your batteries in optimal condition․ Proper cleaning and inspection ensure your Club Car golf cart’s batteries remain reliable and efficient for years to come․ Always follow safety guidelines and recommended practices when handling and maintaining your batteries․ Regular checks and cleaning are essential for preserving battery health and ensuring consistent power delivery․ Keep your Club Car golf cart’s batteries in top condition with routine cleaning and inspection․ This simple maintenance task can significantly impact the longevity and performance of your batteries․ Always handle batteries with care and follow the recommended cleaning process to ensure safety and effectiveness․ Regular cleaning and inspection are vital for maintaining the health and reliability of your Club Car golf cart’s batteries․ By staying proactive‚ you can prevent common issues and enjoy uninterrupted use of your cart․ Cleanliness and regular checks are key to preserving battery performance and ensuring consistent power delivery․ Always prioritize battery maintenance to keep your Club Car running smoothly and efficiently․ Regular cleaning and inspection are simple yet effective ways to extend battery life and enhance overall cart performance․ Stay informed and proactive to maintain your batteries in optimal condition․ Proper cleaning and inspection ensure your Club Car golf cart’s batteries remain reliable and efficient for years to come․ Always follow safety guidelines and recommended practices when handling and maintaining your batteries․ Regular checks and cleaning are essential for preserving battery health and ensuring consistent power delivery․ Keep your Club Car golf cart’s batteries in top condition with routine cleaning and inspection․ This simple maintenance task can significantly impact the longevity and performance of your batteries․ Always handle batteries with care and follow the recommended cleaning process to ensure safety and effectiveness․ Regular cleaning and inspection are vital for maintaining the health and reliability of your Club Car golf cart’s batteries․ By staying proactive‚ you can prevent common issues and enjoy uninterrupted use of your cart․ Cleanliness and regular checks are key to preserving battery performance and ensuring consistent power delivery․ Always prioritize battery maintenance to keep your Club Car running smoothly and efficiently․ Regular cleaning and inspection are simple yet effective ways to extend battery life and enhance overall cart performance․ Stay informed and proactive to maintain your batteries in optimal condition․ Proper cleaning and inspection ensure your Club Car golf cart’s batteries remain reliable and efficient for years to come․ Always follow safety guidelines and recommended practices when handling and maintaining your batteries․ Regular checks and cleaning are essential for preserving battery health and ensuring consistent power delivery․ Keep your Club Car golf cart’s batteries in top condition with routine cleaning and inspection․ This simple maintenance task can significantly impact the longevity and performance of your batteries․ Always handle batteries with care and follow the recommended cleaning process to ensure safety and effectiveness․ Regular cleaning and inspection are vital for maintaining the health and reliability of your Club Car golf cart’s batteries․ By staying proactive‚ you can prevent common issues and enjoy uninterrupted use of your cart․ Cleanliness and regular checks are key to preserving battery performance and ensuring consistent power delivery․ Always prioritize battery maintenance to keep your Club Car running smoothly and efficiently․ Regular cleaning and inspection are simple yet effective ways to extend battery life and enhance overall cart performance․ Stay informed and proactive to maintain your batteries in optimal condition․ Proper cleaning and inspection ensure your Club Car golf cart’s batteries remain reliable and efficient for years to come․ Always follow safety guidelines and recommended practices when handling and maintaining your batteries․ Regular checks and cleaning are essential for preserving battery health and ensuring consistent power delivery․ Keep your Club Car golf cart’s batteries in top condition with routine cleaning and inspection․ This simple maintenance task can significantly impact the longevity and performance of your batteries․ Always handle batteries with care and follow the recommended cleaning process to ensure safety and effectiveness․ Regular cleaning and inspection are vital for maintaining the health and reliability of your Club Car golf cart’s batteries․ By staying proactive‚ you can prevent common issues and enjoy uninterrupted use of your cart․ Cleanliness and regular checks are key to preserving battery performance and ensuring consistent power delivery; Always prioritize battery maintenance to keep your Club Car running smoothly and efficiently․ Regular cleaning and inspection are simple yet effective ways to extend battery life and enhance overall cart performance․ Stay informed and proactive to maintain your batteries in optimal condition․ Proper cleaning and inspection ensure your Club Car golf cart’s batteries remain reliable and efficient for years to come․ Always follow safety guidelines and recommended practices when handling and maintaining your batteries․ Regular checks and cleaning are essential for preserving battery health and ensuring consistent power delivery․ Keep your Club Car golf cart’s batteries in top condition with routine cleaning and inspection․ This simple maintenance task can significantly impact the longevity and performance of your batteries․ Always handle batteries with care and follow the recommended cleaning process to ensure safety and effectiveness․ Regular cleaning and inspection are vital for maintaining the health and reliability of your Club Car golf cart’s batteries․ By staying proactive‚ you can prevent common issues and enjoy uninterrupted use of your cart․ Cleanliness and regular checks are key to preserving battery performance and ensuring consistent power delivery․ Always prioritize battery maintenance to keep your Club Car running smoothly and efficiently․

8․2 Checking and Maintaining Battery Water Levels

Regularly check battery water levels to ensure optimal charging and performance․ Use distilled water to top up cells‚ avoiding overfilling․ Check levels after charging when water is at its lowest․ Wear gloves and ensure good ventilation․ Avoid overfilling to prevent acid spills․ Maintain water levels to cover plates fully․ Consult your Club Car manual for specific guidelines․ Proper water levels are crucial for battery longevity and performance․ Always use distilled water to prevent contamination․ Ensure the area is well-ventilated and avoid smoking․ Regular checks prevent damage from overcharging or dry cells․ Maintain water levels to ensure reliable power delivery․ Always follow safety precautions when handling batteries․ Check and maintain water levels regularly to extend battery life and ensure consistent performance․ Proper maintenance is key to preserving your Club Car golf cart’s battery health․ Regular checks and timely adjustments ensure optimal charging and prevent potential issues․ Always prioritize battery care for reliable operation․ Maintain water levels to keep your Club Car running smoothly and efficiently․ Regular checks are essential for ensuring battery longevity and performance․ Proper water level maintenance is crucial for optimal charging and overall cart functionality․ Always follow recommended guidelines to keep your batteries in top condition․ Regular checks and maintenance ensure your Club Car golf cart’s batteries remain healthy and reliable․ Proper water levels are vital for consistent power delivery and long battery life․ Always handle batteries with care and follow safety guidelines․ Regular checks and maintenance ensure your Club Car golf cart’s batteries remain in excellent working order․ Proper water level management is essential for optimal performance and longevity․ Always prioritize battery care for reliable operation․ Regular checks and maintenance ensure your Club Car golf cart’s batteries remain healthy and efficient․ Proper water levels are crucial for consistent power delivery and long battery life․ Always follow safety guidelines and recommended practices when handling batteries․ Regular checks and maintenance ensure your Club Car golf cart’s batteries remain in top condition․ Proper water level management is vital for optimal performance and longevity․ Always prioritize battery care for reliable operation․ Regular checks and maintenance ensure your Club Car golf cart’s batteries remain healthy and efficient․ Proper water levels are essential for consistent power delivery and long battery life․ Always handle batteries with care and follow safety guidelines․ Regular checks and maintenance ensure your Club Car golf cart’s batteries remain in excellent working order․ Proper water level management is crucial for optimal performance and longevity․ Always prioritize battery care for reliable operation․ Regular checks and maintenance ensure your Club Car golf cart’s batteries remain healthy and efficient․ Proper water levels are vital for consistent power delivery and long battery life․ Always follow safety guidelines and recommended practices when handling batteries․ Regular checks and maintenance ensure your Club Car golf cart’s batteries remain in top condition․ Proper water level management is essential for optimal performance and longevity․ Always prioritize battery care for reliable operation․ Regular checks and maintenance ensure your Club Car golf cart’s batteries remain healthy and efficient․ Proper water levels are crucial for consistent power delivery and long battery life․ Always handle batteries with care and follow safety guidelines․ Regular checks and maintenance ensure your Club Car golf cart’s batteries remain in excellent working order․ Proper water level management is vital for optimal performance and longevity․ Always prioritize battery care for reliable operation․ Regular checks and maintenance ensure your Club Car golf cart’s batteries remain healthy and efficient․ Proper water levels are essential for consistent power delivery and long battery life․ Always follow safety guidelines and recommended practices when handling batteries․ Regular checks and maintenance ensure your Club Car golf cart’s batteries remain in top condition․ Proper water level management is crucial for optimal performance and longevity․ Always prioritize battery care for reliable operation․ Regular checks and maintenance ensure your Club Car golf cart’s batteries remain healthy and efficient․ Proper water levels are vital for consistent power delivery and long battery life․ Always handle batteries with care and follow safety guidelines․ Regular checks and maintenance ensure your Club Car golf cart’s batteries remain in excellent working order․ Proper water level management is essential for optimal performance and longevity․ Always prioritize battery care for reliable operation․ Regular checks and maintenance ensure your Club Car golf cart’s batteries remain healthy and efficient․ Proper water levels are crucial for consistent power delivery and long battery life․ Always follow safety guidelines and recommended practices when handling batteries․ Regular checks and maintenance ensure your Club Car golf cart’s batteries remain in top condition․ Proper water level management is vital for optimal performance and longevity․ Always prioritize battery care for reliable operation․ Regular checks and maintenance ensure your Club Car golf cart’s batteries remain healthy and efficient․ Proper water levels are essential for consistent power delivery and long battery life․ Always handle batteries with care and follow safety guidelines․ Regular checks and maintenance ensure your Club Car golf cart’s batteries remain in excellent working order․ Proper water level management is crucial for optimal performance and longevity․ Always prioritize battery care for reliable operation․ Regular checks and maintenance ensure your Club Car golf cart’s batteries remain healthy and efficient․ Proper water levels are vital for consistent power delivery and long battery life․ Always follow safety guidelines and recommended practices when handling batteries․ Regular checks and maintenance ensure your Club Car golf cart’s batteries remain in top condition․ Proper water level management is essential for optimal performance and longevity․ Always prioritize battery care for reliable operation․ Regular checks and maintenance ensure your Club Car golf cart’s batteries remain healthy and efficient․ Proper water levels are crucial for consistent power delivery and long battery life․ Always handle batteries with care and follow safety guidelines․ Regular checks and maintenance ensure your Club Car golf cart’s batteries remain in excellent working order․ Proper water level management is vital for optimal performance and longevity․ Always prioritize battery care for reliable operation․ Regular checks and maintenance ensure your Club Car golf cart’s batteries remain healthy and efficient․ Proper water levels are essential for consistent power delivery and long battery life․ Always follow safety guidelines and recommended practices when handling batteries․ Regular checks and maintenance ensure your Club Car golf cart’s batteries remain in top condition․ Proper water level management is crucial for optimal performance and longevity․ Always prioritize battery care for reliable operation․ Regular checks and maintenance ensure your Club Car golf cart’s batteries remain healthy and efficient․ Proper water levels are vital for consistent power delivery and long battery life․ Always handle batteries with care and follow safety guidelines․ Regular checks and maintenance ensure your Club Car golf cart’s batteries remain in excellent working order․ Proper water level management is essential for optimal performance and longevity․ Always prioritize battery care for reliable operation․ Regular checks and maintenance ensure your Club Car golf cart’s batteries remain healthy and efficient․ Proper water levels are crucial for consistent power delivery and long battery life․ Always follow safety guidelines and recommended practices when handling batteries․ Regular checks and maintenance ensure your Club Car golf cart’s batteries remain in top condition․ Proper water level management is vital for optimal performance and longevity․ Always prioritize battery care for reliable operation․ Regular checks and maintenance ensure your Club Car golf cart’s batteries remain healthy and efficient․ Proper water levels are essential for consistent power delivery and long battery life․ Always handle batteries with care and follow safety guidelines․ Regular checks and maintenance ensure your Club Car golf cart’s batteries remain in excellent working order․ Proper water level management is crucial for optimal performance and longevity; Always prioritize battery care for reliable operation․ Regular checks and maintenance ensure your Club Car golf cart’s batteries remain healthy and efficient․ Proper water levels are vital for consistent power delivery and long battery life․ Always follow safety guidelines and recommended practices when handling batteries․

half baked vape instructions

Welcome to the ultimate guide for using the Half Baked Vape! This comprehensive resource will walk you through setup, usage, and tips for an optimal experience. Designed for both newcomers and experienced users, these instructions ensure you maximize the device’s potential and enjoy a smooth, potent vaping session.

Overview of the Half Baked Vape

The Half Baked Vape is a cutting-edge disposable vape designed for convenience and potency; It features live resin blends, offering a smooth and flavorful experience. Known for its portability and ease of use, the device is perfect for both beginners and experienced vapers. With its autodraw technology and preheat function, it ensures consistent vapor production. The Half Baked Vape stands out for its non-psychoactive properties and therapeutic benefits, such as relaxation and euphoria. Its compact design and one-time-use functionality make it an ideal choice for those seeking a hassle-free vaping experience without the need for refilling or recharging.

Importance of Proper Usage

Proper usage of the Half Baked Vape is crucial for maximizing its performance and ensuring a safe experience. Following the guidelines helps maintain the device’s functionality and prevents issues like clogged airflow or uneven heating. Starting with low doses allows users to gauge their tolerance and avoid overwhelming effects. Correct inhalation techniques prevent overconsumption and potential discomfort; Regular maintenance, such as cleaning the mouthpiece and storing the vape properly, extends its lifespan. Adhering to these practices ensures a smooth, enjoyable vaping experience and protects the user’s health and the device’s efficiency.

Unboxing and Initial Setup

Unbox your Half Baked Vape and ensure all components are included. Inspect for damage, charge if needed, and familiarize yourself with the device for a seamless start.

What’s Included in the Package

Your Half Baked Vape package typically contains a disposable vape device, a pre-filled cartridge with live resin sauce, and a user manual. Some kits may include a USB charger for reusable batteries, while others are ready-to-use with no additional setup required. The disposable design eliminates the need for refilling or recharging, making it a convenient option for on-the-go use. Ensure all components are accounted for upon unboxing to guarantee a smooth and enjoyable vaping experience from the start.

Inspecting the Device for Damage

Before using your Half Baked Vape, carefully inspect the device for any visible damage. Check the mouthpiece for blockages or cracks, and ensure the cartridge is securely attached without leaks. Examine the battery for signs of wear or corrosion and verify that all connections are clean and intact. Inspect the outer casing for dents or scratches that could affect performance. If any damage is found, do not use the device. Regular inspections help maintain functionality and ensure a safe, enjoyable vaping experience. Always consult the user manual or contact customer support if issues arise.

Charging the Battery (If Applicable)

For rechargeable Half Baked Vape models, charging is essential for optimal performance. Use the provided USB-C cable to charge the battery. Ensure the charger is certified and compatible to avoid damage. Connect the device to a power source and wait for the LED indicator to signal charging. Avoid overcharging, as it may reduce battery life. Some models feature a preheat function activated by pressing the power button twice. If your device has a rechargeable battery, charge it fully before first use. Always store the charger in a cool, dry place to maintain safety and efficiency. Proper charging ensures consistent vapor production and device longevity.

Activating the Device

Press the power button rapidly five times to activate the device. The LED indicator will flash, confirming the vape is ready for use. Ensure it’s fully charged for optimal performance.

Turning the Device On/Off

To activate your Half Baked Vape, press the power button rapidly five times. The LED light will flash, indicating the device is turned on. To turn it off, repeat the same process. This feature ensures easy control and prevents accidental activation. Some models may also feature an auto-draw function, allowing you to vape without pressing buttons. Proper activation is crucial for optimal performance and safety. Always ensure the device is fully charged before use for a seamless experience.

Understanding the Power Button Functions

The power button is central to operating your Half Baked Vape. Pressing it five times quickly turns the device on or off, while pressing it twice activates the preheat mode, indicated by a flashing light. This feature ensures your vape is ready for use with a consistent temperature. Additionally, some models allow voltage adjustment by holding the button, enhancing customization. Understanding these functions optimizes your vaping experience, ensuring smooth and efficient use. Familiarize yourself with these controls to maximize performance and enjoyment.

Preheating the Vape for Optimal Use

Preheating your Half Baked Vape is essential for a smooth and consistent experience. To activate the preheat mode, press the power button twice, which will trigger a flashing light indicating the process has begun. This step ensures the ceramic coil reaches the ideal temperature, preventing clogs and delivering flavorful vapor. Allowing the device to preheat for a few seconds before inhalation enhances the quality of your draw and avoids harsh hits. This simple yet crucial step is designed to maximize enjoyment and maintain the device’s performance for a satisfying vaping session.

Inhalation Techniques

Mastering inhalation is key to enjoying your Half Baked Vape. Use smooth, controlled breaths to ensure optimal vapor production and a consistent, satisfying experience every time.

Proper Breathing Methods

Proper breathing is crucial for an optimal vaping experience. Inhale slowly and deeply through the mouthpiece, allowing the vapor to fill your lungs evenly. Avoid harsh or rapid breaths, as they can disrupt the flow and reduce the effectiveness. For draw-activated devices, a steady draw is essential to activate the heating element. If using a button-activated vape, press the button while inhaling to ensure consistent vapor production. Always exhale slowly to fully release the vapor and maximize the effects. Practice these techniques to enhance your overall experience with the Half Baked Vape.

Draw-Activated vs. Button-Activated Vapes

Understanding the difference between draw-activated and button-activated vapes is key to using your device effectively. Draw-activated vapes, like the Half Baked disposable, automatically heat up when you inhale, eliminating the need for buttons. Simply take a slow, steady draw, and the device will produce vapor. Button-activated vapes require pressing a power button before or during inhalation, offering more control over the heating process. Both methods deliver smooth vapor, but draw-activated models are more convenient for on-the-go use. Choose the method that suits your preference for a seamless vaping experience with the Half Baked Vape.

Controlling the Dosage

Controlling your dosage with the Half Baked Vape is straightforward, thanks to its intuitive design. Start with short, controlled draws to gauge the effects, as the live resin blend offers potent results. The autodraw feature allows you to regulate the amount of vapor inhaled effortlessly. For a lighter hit, take shorter puffs, and for a stronger experience, inhale more deeply. Always begin with a low dose and gradually increase as needed to find your comfort level. This method ensures a personalized and enjoyable vaping experience with the Half Baked Vape, making it easy to manage your intake effectively.

Maintenance and Cleaning

Regularly clean the mouthpiece with a soft cloth to prevent residue buildup. Store the vape upright to avoid leakage and ensure optimal airflow for consistent performance.

Cleaning the Mouthpiece

To clean the mouthpiece, use a soft, dry cloth to wipe away residue and debris. For tougher buildup, lightly dampen the cloth with water, but avoid harsh chemicals. Regular cleaning prevents clogging and ensures smooth airflow. Gently scrub the mouthpiece, paying attention to the crevices where residue often accumulates. Dry thoroughly before use to maintain hygiene and prevent moisture-related issues. Cleaning the mouthpiece regularly enhances flavor quality and overall vaping performance. This simple maintenance step is essential for prolonging the life of your Half Baked Vape and ensuring consistent, satisfying sessions.

Preventing Clogged Airflow

To prevent clogged airflow in your Half Baked Vape, ensure the device is stored upright and away from extreme temperatures; Avoid exposing it to moisture, as this can cause residue buildup. Regularly clean the mouthpiece and airflow channels with a soft brush or dry cloth. Do not overfill the cartridge, as excess oil can leak into the airflow path. If you notice a clog, gently tap the device or use the preheat function to loosen debris. Proper storage and maintenance will help maintain smooth airflow and enhance your vaping experience.

Storing the Vape Properly

Store your Half Baked Vape in a cool, dry place away from direct sunlight and moisture. Keep the device upright to prevent leakage. Use a protective case to avoid damage during transport. Avoid extreme temperatures, as they can degrade the battery or oil quality. For long-term storage, ensure the cartridge is sealed tightly and placed in an airtight container. Proper storage maintains the device’s performance and preserves the flavor and potency of the vape oil. Always follow these guidelines to ensure your Half Baked Vape remains in optimal condition for your next use.

Tips for the Best Vaping Experience

Start with low doses, inhale gently, and use the autodraw feature for a smooth experience; Experiment with preheating for consistent vapor and optimal flavor.

Starting with Low Dosage

Begin with a low dosage to gauge your tolerance and comfort level. This ensures a smooth introduction to the potent effects of THC-A and other compounds. Start with short, gentle draws and gradually increase as needed. Low dosages help prevent overwhelming experiences, allowing you to enjoy the therapeutic benefits without discomfort. The Half Baked Vape is designed for controlled inhalation, so take your time to find the perfect balance. Always prioritize moderation, especially if you’re new to vaping or unfamiliar with the effects of live resin blends.

Understanding the Effects of THC-A

THC-A, a non-psychoactive compound, offers therapeutic benefits like deep relaxation and euphoria without the intoxicating effects of THC. It interacts with the body’s endocannabinoid system, providing relief from stress and discomfort. The Half Baked Vape’s live resin blend, including THC-A, ensures a smooth and consistent experience. Start with low doses to understand how your body responds, as effects can vary. This compound is ideal for users seeking wellness benefits without psychoactive outcomes, making it a popular choice for both medical and recreational purposes.

Using the Autodraw Feature Effectively

The autodraw feature of the Half Baked Vape allows for seamless and button-free operation, activating when you inhale. To use it effectively, take gentle, steady draws through the mouthpiece. The device will automatically heat and deliver smooth vapor. Avoid hard inhales, as this can disrupt airflow. After each draw, the autodraw feature will pause, ensuring optimal temperature control. For the best experience, take short pauses between draws to prevent overheating. This feature is ideal for users seeking convenience and efficiency, making it a standout option for on-the-go vaping.

Troubleshooting Common Issues

Address clogged airflow by cleaning the mouthpiece and ensuring proper storage. Resolve battery malfunctions by charging appropriately or replacing faulty units. Fix leaks by avoiding excessive heat exposure.

Fixing a Clogged Vape

A clogged vape can be resolved by gently cleaning the mouthpiece and airway with a cotton swab dipped in rubbing alcohol. Allow the device to dry completely before reuse. If the issue persists, warm the vape slightly by holding it in your hand for a few minutes or using a hairdryer on a low setting. This helps loosen any residue. Avoid using harsh chemicals or forcing objects through the airway, as this may damage the device; Regular cleaning and proper storage can prevent clogs and ensure smooth vaping sessions.

Resolving Battery Malfunctions

If your Half Baked Vape experiences battery issues, start by ensuring the connection is clean and secure. Gently clean the battery contact with a cotton swab dipped in rubbing alcohol. Allow it to dry before reattaching the cartridge. If the battery doesn’t activate, press the power button five times to check if it’s turned on. Avoid overcharging, as this can damage the battery. For disposables, ensure the device is fully charged before use. If problems persist, contact customer support for assistance. Proper care and maintenance will extend the life of your vape and ensure consistent performance.

Dealing with Leaks or Condensation

If you notice leaks or condensation in your Half Baked Vape, ensure the cartridge is tightly secured to the battery. Store the device upright to prevent oil from leaking. Regularly clean the mouthpiece and connections with a cotton swab to remove residue. Avoid inhaling too forcefully, as this can cause excessive pressure. For condensation, gently tap the device or let it sit upright for a few minutes. Proper storage in a cool, dry place will help maintain performance. Addressing these issues promptly ensures a seamless vaping experience and prolongs the device’s lifespan.

Safety Precautions

Keep the device away from children and pets. Avoid extreme temperatures or direct sunlight. Store properly to prevent leaks or damage, ensuring safe and responsible use.

General Vaping Safety Tips

Always prioritize safety when using your Half Baked Vape. Keep the device out of reach of children and pets to avoid accidental ingestion or damage. Store the vape in a cool, dry place away from direct sunlight to prevent overheating or degradation of the product. Never use damaged or malfunctioning devices, as this can lead to safety hazards. Start with low dosages to assess tolerance and gradually increase as needed. Follow proper charging instructions if applicable, and avoid using unauthorized chargers. Ensure the device is turned off when not in use to conserve battery and prevent unintended activation.

  • Avoid extreme temperatures or direct sunlight exposure.
  • Never leave the vape unattended while in use.
  • Use the device responsibly to ensure a safe and enjoyable experience.

Storage Safety for Disposables

Proper storage is crucial for maintaining the quality and safety of your Half Baked disposable vape. Store the device in a cool, dry place, away from direct sunlight and moisture. Avoid exposing it to extreme temperatures, as this can degrade the vape’s components or affect the consistency of the live resin. Keep the vape upright to prevent leakage and protect the mouthpiece from dust or debris. Always store disposables out of reach of children and pets to ensure safety. For long-term storage, avoid leaving the device unused for extended periods, as this may affect performance. Store the vape in its original packaging if possible to maintain freshness and integrity.

  • Avoid direct sunlight and moisture.
  • Keep the device upright to prevent leaks.
  • Store out of reach of children and pets.

Disposing of the Vape Responsibly

When your Half Baked disposable vape is empty, dispose of it responsibly to minimize environmental impact. Ensure the device is completely out of battery before disposal to prevent any accidental activation. Check local regulations for electronic waste disposal options, as improper disposal can harm the environment. Do not attempt to refill or dismantle the vape, as this can be hazardous. Instead, take the device to designated e-waste recycling centers or participate in community collection programs. Proper disposal helps protect the environment and promotes sustainable practices.

  • Ensure the device is fully depleted before disposal.
  • Use e-waste recycling centers for safe disposal.

Advanced Features of Half Baked Vape

Explore the cutting-edge features of the Half Baked Vape, designed to enhance your vaping experience with precision and convenience. From preheat functions to voltage adjustments, these advanced settings allow you to customize your sessions for optimal flavor and vapor quality. The LED indicators provide real-time feedback, ensuring you stay informed about your device’s status. With these innovative tools, you can tailor your experience to suit your preferences and enjoy a seamless, elevated vaping journey with every draw.

Using the Preheat Function

The preheat function on the Half Baked Vape ensures a smooth and consistent experience by gently warming the ceramic coil before use. To activate this feature, press the power button twice, indicated by a flashing light. This process helps prevent clogs and ensures even heating of the live resin sauce, delivering a flavorful and potent draw. Regular use of the preheat function can enhance vapor quality and prolong the life of your device. Always preheat before taking a draw to maximize efficiency and enjoy a seamless vaping session.

Adjusting Voltage (If Applicable)

While the Half Baked Vape is designed for simplicity, some models may offer voltage adjustment to customize your experience. If applicable, press the power button three times to cycle through voltage settings, typically indicated by color-changing LED lights. Lower voltage provides a smoother draw, while higher voltage increases vapor production and intensity. Experiment with different settings to find your preference for optimal flavor and potency. Remember, not all Half Baked Vapes include voltage adjustment, so refer to your device’s specific features for guidance. This feature enhances personalization, ensuring a tailored vaping experience.

Understanding the LED Indicators

The LED indicators on your Half Baked Vape provide essential feedback about the device’s status. When activating the vape, the LED will flash to confirm it’s turning on or off. During preheating, the light may pulse or change color to indicate the cycle is active. Voltage adjustments are often signaled by color changes, showing different power levels. A blinking LED can also indicate low battery or a charging status. These visual cues help you monitor the device’s operation and ensure a seamless vaping experience. Familiarizing yourself with these indicators allows you to troubleshoot and optimize your vape use effectively.

Comparison with Other Vape Products

Half Baked Vape stands out among other disposable vapes with its live resin blend and autodraw feature, offering a unique combination of potency and convenience.

Benefits of Disposable Vapes

Disposable vapes like the Half Baked Vape offer unmatched convenience and ease of use. They require no charging, refilling, or maintenance, making them perfect for on-the-go vaping. Simply inhale to activate, and dispose of them once empty. Their portability and discretion make them ideal for casual users. With no complex settings or upkeep, disposable vapes are user-friendly and eliminate the hassle of carrying extra accessories. This simplicity ensures a seamless experience, catering to both beginners and experienced vapers seeking a hassle-free option. Their compact design and ready-to-use functionality set them apart from reusable devices.

Live Resin vs. Traditional Vape Oils

Live resin and traditional vape oils differ significantly in terms of extraction methods and potency. Live resin is derived from fresh, uncured cannabis, preserving more terpenes and cannabinoids for a richer flavor and effect. Traditional oils often undergo curing, which can lose some compounds. Half Baked Vapes use live resin, offering a more authentic and potent experience. This makes them ideal for users seeking robust flavor and strong effects. The preservation of natural terpenes in live resin also enhances the aroma, providing a more satisfying vape session compared to standard oils.

Why Choose Half Baked Vape?

Half Baked Vape stands out for its exceptional quality and convenience. Designed for easy use, it offers a potent and long-lasting experience with its unique blend of THC-A, THC-P, and Delta 9 THC. The disposable design eliminates the need for refilling or recharging, making it perfect for on-the-go users. With live resin sauce, it delivers a smoother and more flavorful vape compared to traditional oils. Its autodraw feature ensures a hassle-free experience, while the preheat function enhances consistency. Choose Half Baked Vape for a powerful, therapeutic, and enjoyable vaping experience that combines convenience with premium quality.

Frequently Asked Questions

Common inquiries include whether Half Baked Vapes contain nicotine, how long they last, and if cartridges can be refilled. These questions are addressed for clarity.

Do Half Baked Vapes Contain Nicotine?

No, Half Baked Vapes do not contain nicotine or tobacco. They are specifically designed to deliver THC-A and live resin cannabis extracts. These products cater to users seeking non-nicotine, cannabis-based experiences. The focus is on providing potent, long-lasting effects, including therapeutic benefits like relaxation and euphoria. If you’re looking to avoid nicotine, Half Baked Vapes offer a convenient and flavorful alternative for cannabis enthusiasts.

How Long Does a Disposable Vape Last?

The lifespan of a Half Baked Disposable Vape depends on usage frequency and individual habits. Typically, it can last between 200 to 300 puffs, offering a consistent experience throughout. Designed for convenience, these vapes are perfect for on-the-go use, with no need for refilling or recharging. They provide a hassle-free option for users seeking a potent and long-lasting vaping experience without the maintenance of reusable devices.

Can I Refill the Cartridge?

The Half Baked Disposable Vape is designed for single-use, making it convenient and user-friendly. Refilling the cartridge is not recommended, as it may compromise the device’s functionality and safety. The vape’s structure is sealed to ensure optimal performance and flavor consistency. Once the cartridge is empty, simply dispose of it responsibly and replace it with a new one for continued enjoyment. This design eliminates the need for maintenance, offering a hassle-free vaping experience tailored for simplicity and ease of use.

By following these guidelines, you’ll optimize your Half Baked Vape experience, ensuring safety and satisfaction. Happy vaping responsibly, and enjoy the smooth, potent sessions ahead!

Final Tips for Enjoying Your Vape

  • Always start with a low dosage to assess your tolerance and gradually increase as needed.
  • Preheat the vape before use for consistent vapor production and flavor.
  • Use smooth, steady inhales to maximize vapor quality and avoid harsh hits.
  • Store the device upright in a cool, dry place to prevent leaks or condensation.
  • Experiment with different inhalation techniques to find what works best for you;
  • Keep the mouthpiece clean to ensure optimal airflow and hygiene.

By following these tips, you’ll enhance your vaping experience and enjoy the full benefits of your Half Baked Vape.

Encouraging Responsible Vaping

Responsible vaping is essential for a safe and enjoyable experience. Always start with low dosages to understand how your body reacts to THC-A and other compounds. Be mindful of your surroundings and avoid vaping in prohibited areas. Store the device securely to prevent accidental use by minors or pets. Dispose of the vape responsibly, following local regulations to protect the environment. Avoid sharing the device to maintain hygiene and safety. Stay informed about local laws and health guidelines. By prioritizing responsible vaping practices, you contribute to a safer and more respectful vaping community while maximizing your enjoyment.

ridx instructions

RID-X is a septic tank treatment containing natural bacteria and enzymes. Following instructions ensures optimal performance, prevents backups, and maintains system health. Proper usage is crucial for effectiveness and safety.

Overview of RID-X and Its Purpose

RID-X is a septic tank treatment designed to break down household waste using natural bacteria and enzymes. Its purpose is to restore balance, prevent backups, and maintain system efficiency. By adding RID-X, homeowners help maintain beneficial bacteria levels, ensuring waste decomposition and smooth septic operation. Regular use promotes a healthy system, reduces clogs, and extends tank life. RID-X is safe for pipes and environmentally friendly, making it a reliable choice for septic maintenance in homes and RVs.

Importance of Following RID-X Instructions

Following RID-X instructions ensures optimal performance and prevents system damage. Proper dosage and application maintain bacterial balance, preventing backups and costly repairs. Deviating from guidelines can harm the septic system, reduce treatment effectiveness, and pose environmental risks. Adhering to instructions guarantees longevity, efficiency, and safety of your septic system, protecting your investment and the environment.

Key Benefits of Using RID-X

RID-X effectively breaks down household waste, restores beneficial bacteria balance, and prevents septic backups. Regular use ensures a smoothly functioning system and prolongs its lifespan.

Breaking Down Household Waste

RID-X contains natural bacteria and enzymes that break down household waste, reducing sludge and scum layers in septic tanks. These microbes target proteins, carbohydrates, and fats, ensuring efficient decomposition. Regular use helps maintain a balanced ecosystem, preventing clogs and backups. By digesting organic matter, RID-X minimizes the need for frequent pumping, saving homeowners time and money. Proper application ensures waste is processed effectively, keeping the system running smoothly and preventing potential issues. Consistent use supports long-term septic health and functionality.

Restoring Beneficial Bacteria Balance

RID-X helps restore the natural balance of beneficial bacteria and enzymes in septic systems. These microbes break down waste efficiently, ensuring proper decomposition and preventing system imbalances. Regular use replenishes bacteria lost due to harsh chemicals or heavy usage. By maintaining this balance, RID-X promotes a healthy ecosystem, reducing odors and backups. Proper dosage ensures optimal performance without overloading the system. This restoration supports long-term septic health, preventing costly repairs and maintaining smooth operation. Consistent use is key to sustaining bacterial equilibrium and overall system functionality.

Preventing Septic System Backups

RID-X prevents septic backups by breaking down household waste into simpler compounds. This reduces sludge and scum layers, minimizing clogs in pipes and tanks. Regular use ensures waste flows freely, avoiding costly backups. By maintaining a balanced bacterial ecosystem, RID-X keeps systems functioning smoothly, reducing the risk of overflows and damage. Proper application according to instructions is essential for optimal backup prevention and long-term system health. Consistent treatment helps safeguard against unexpected failures, protecting both the system and the environment from potential harm.

Step-by-Step Usage Instructions

Start by determining the correct dosage based on your septic tank size. Pour the recommended amount of RID-X down the drain, preferably into the toilet. Flush thoroughly to distribute the treatment throughout the system. Ensure water runs for a few minutes to help the product reach the tank. Repeat monthly for maintenance. Always follow the package instructions to avoid overuse. Proper application ensures the product works effectively, maintaining a healthy septic system and preventing backups. Consistency is key to long-term functionality and efficiency of your septic setup.

Determining the Correct Dosage

To ensure effectiveness, always use the recommended dosage on the RID-X packaging. For most residential systems, 8 ounces or one packet is sufficient for tanks up to 1,500 gallons. Larger tanks or systems with heavy use may require the Pro Strength formula. Dosage needs vary based on household size and waste volume. Overdosing can harm the system, so adhere to the guidelines. Check the product label for specific instructions tailored to your tank size and maintenance needs. Proper dosing ensures optimal performance and prevents potential issues.

Pouring RID-X Down the Drain

Pour the entire contents of one RID-X packet or 8 ounces directly into the toilet bowl or main drain. For RVs, use the same method but adjust the amount based on tank size. Ensure the water level is low before pouring. Allow the product to sit for 15 minutes to activate enzymes. Avoid pouring into sinks or showers, as the toilet provides the best distribution. This method ensures RID-X reaches the septic tank effectively, promoting even treatment and preventing clogs.

Flushing the System Properly

After pouring RID-X into the toilet or drain, flush the toilet twice to ensure the product reaches the septic tank. For optimal results, flush when plumbing won’t be used for a few hours. This allows RID-X to work without interference. Run water through other drains if necessary to help distribute the treatment evenly. Proper flushing ensures RID-X spreads throughout the septic system, breaking down waste effectively and preventing backups. Regular, correct flushing maintains system health and longevity.

Types of RID-X Products

RID-X offers various formulas, including Pro Strength for larger tanks, Septic Tank Cleaner for deep cleaning, RV-friendly options, and convenient Powder, Liquid, and Gel Septi-Pacs.

RID-X Pro Strength for Larger Tanks

RID-X Pro Strength is designed for larger septic tanks, typically those between 1,500 and 2,500 gallons, or systems with heavy usage. This formula is more concentrated, ensuring efficient breakdown of household waste in bigger systems. It helps maintain optimal bacterial balance and prevents clogs or backups. Pro Strength is ideal for homes with multiple bathrooms or high water usage, ensuring the septic system operates smoothly. Regular use of this product supports long-term system health and reduces the need for frequent pumping. It is a reliable solution for larger septic systems.

RID-X Septic Tank Cleaner for Deep Cleaning

RID-X Septic Tank Cleaner is a concentrated formula designed for deep cleaning neglected septic tanks. It targets stubborn buildup, odors, and clogs by breaking down tough waste. This product is ideal for systems that haven’t been maintained regularly or show signs of slow drainage. By using the cleaner, homeowners can restore their system’s efficiency and prevent costly backups. It’s a powerful solution for addressing severe septic issues, ensuring optimal performance and extending the system’s lifespan. Regular use helps maintain a healthy, functioning septic system.

RID-X for RV and Home Use

RID-X is versatile for both home and RV septic systems, ensuring efficient waste breakdown. Its formula is designed to work in various settings, maintaining bacterial balance. Easy to apply, it prevents clogs and odors in residential and recreational vehicle systems. Regular use helps sustain septic health, ensuring longevity and preventing backups. Perfect for homeowners and RV owners, RID-X adapts to different needs, offering reliable maintenance for septic systems of all sizes and types.

RID-X Powder, Liquid, and Gel Septi-Pacs

RID-X offers convenient formulas in powder, liquid, and gel Septi-Pacs for easy application. Each form is designed to break down waste efficiently, with the powder mixing into a tea-like solution for drains, while liquids and gels provide quick action. These Septi-Pacs are pre-measured, eliminating guesswork, and are suitable for systems up to 1,500 gallons. Regular monthly use ensures optimal septic health, preventing backups and odors. Their versatility makes them ideal for both home and RV use, catering to varying maintenance needs.

Maintenance Tips for Septic Systems

Regular RID-X use, monitoring system health, and proper waste disposal are key. These practices prevent backups, extend system lifespan, and ensure efficient waste breakdown, avoiding costly repairs.

Regular Use of RID-X

Regular use of RID-X ensures consistent bacterial activity, breaking down waste efficiently. Apply monthly, following dosage instructions based on tank size. Pour the recommended amount into the toilet or drain, then flush thoroughly. This helps maintain a balanced ecosystem, preventing clogs and backups. RID-X is available in powder, liquid, or gel forms, making it convenient for various systems. Consistency is key to prolonging septic system life and preventing costly repairs. Always follow the product guidelines for optimal results and system health.

Monitoring Septic System Health

Regular monitoring ensures your septic system operates efficiently. Watch for signs like slow drains, backups, or foul odors, which may indicate imbalances. Inspect the tank annually and pump every 3-5 years. Use RID-X monthly to maintain bacterial balance, but avoid overuse, as it can harm the system. Some experts caution that additives like RID-X may not be necessary and could disrupt natural processes. Always observe system changes and consult professionals if issues arise to prevent costly repairs and environmental damage.

The Science Behind RID-X

RID-X uses natural bacteria and enzymes to decompose household waste, restoring bacterial balance and preventing clogs. Its formula optimizes septic system functionality effectively.

Natural Bacteria and Enzymes

RID-X contains billions of natural bacteria and enzymes scientifically formulated to break down household waste. These components work synergistically to digest organic matter, restoring the bacterial balance in septic systems; The enzymes target proteins, fats, and carbohydrates, while bacteria further decompose waste into harmless byproducts. This natural process prevents sludge buildup and clogs, ensuring smooth system operation. Regular use maintains optimal microbial activity, reducing the need for frequent pumping and minimizing environmental impact.

How RID-X Works in the Septic Tank

RID-X introduces natural bacteria and enzymes into the septic tank, where they break down organic waste into simpler compounds. These microorganisms target the scum and sludge layers, preventing their accumulation and maintaining a balanced ecosystem. As waste is digested, the risk of clogs and backups decreases, allowing the system to function efficiently. Regular application ensures continuous microbial activity, promoting a healthy septic environment and prolonging system longevity.

Environmental Considerations

RID-X uses eco-friendly ingredients, minimizing environmental impact. However, overuse can disrupt natural processes, potentially harming ecosystems. Proper usage is vital for sustainability and system health.

Eco-Friendly Ingredients

RID-X contains natural, biodegradable ingredients like bacteria, enzymes, and wheat bran, which break down waste without harming the environment. These components are non-toxic and gentle on pipes and tanks. The formula avoids harsh chemicals, making it safer for soil and water systems. By using eco-friendly ingredients, RID-X supports sustainable septic system maintenance. Proper usage ensures these ingredients work effectively without causing ecological damage, promoting a balanced and healthy septic environment; This makes RID-X a responsible choice for homeowners seeking environmentally conscious solutions.

Potential Risks of Overuse

Exceeding the recommended dosage of RID-X can disrupt the natural balance of your septic system. Overuse may kill beneficial bacteria, reducing the system’s efficiency; This imbalance can lead to clogs, backups, and costly repairs. Additionally, excessive enzymes may not break down waste effectively, potentially harming the environment. Following the instructions carefully is essential to avoid these risks and maintain a healthy septic system. Always adhere to the specified dosage to ensure optimal performance and prevent unintended consequences.

Troubleshooting Common Issues

Identify septic system problems early, such as backups or odors. Check for proper RID-X usage and system maintenance. If issues persist, consult a professional to avoid further damage.

Identifying Septic System Problems

Common septic issues include slow drains, backups, and unpleasant odors. These signs indicate potential clogs or imbalances in the system. Regular RID-X use helps prevent such problems by breaking down waste. However, if symptoms persist, it may signal a deeper issue, such as a full tank or damaged pipes. Monitoring system health and addressing issues early can prevent costly repairs. Always follow RID-X instructions to maintain optimal performance and avoid complications.

When to Call a Professional

If septic issues persist despite using RID-X, it’s crucial to seek professional help. Signs like recurring backups, strong odors, or slow drains may indicate serious problems. Overflows or lush grass near the drainfield can signal system failure. Professionals can inspect and pump the tank, repair damaged pipes, or address other underlying issues. Regular inspections every 3-5 years are recommended to ensure system longevity and prevent catastrophic failures.

Safety Precautions

Always wear gloves and eye protection when handling RID-X. Avoid skin and eye contact. Store in a cool, dry place, out of reach of children. In case of exposure, rinse thoroughly with water and seek medical attention if irritation occurs.

Handling RID-X Products Safely

When handling RID-X, wear protective gloves and eyewear to avoid skin and eye irritation. Ensure the area is well-ventilated to prevent inhaling dust or fumes. Keep RID-X products out of reach of children and pets. If accidental contact occurs, rinse thoroughly with water. In case of eye exposure, flush with water for at least 15 minutes and seek medical attention. Always follow the instructions on the label for safe disposal of containers and unused product. Proper handling ensures both personal safety and effective product performance.

Proper Disposal of Containers

After using RID-X, dispose of the container responsibly. Empty containers can be recycled if local facilities accept them. Do not reuse containers for other purposes. For partially filled containers, tighten the lid and dispose of them in household trash. Ensure containers are kept away from children and pets. Always check local regulations for specific guidelines on hazardous waste disposal. Proper disposal helps protect the environment and maintains community safety standards. Follow all regional rules to ensure eco-friendly waste management practices are upheld.

Comparing RID-X to Alternatives

RID-X stands out for its natural bacteria and enzymes, effectively breaking down waste. Competitors may offer similar benefits, but RID-X’s proven formula ensures reliable septic system performance and longevity.

Effectiveness of RID-X vs. Other Brands

RID-X is renowned for its powerful blend of natural bacteria and enzymes, which effectively break down household waste. Compared to other brands, RID-X offers consistent performance, preventing backups and odors. Its formula is scientifically designed to maintain bacterial balance, ensuring septic systems operate efficiently. While alternatives may claim similar benefits, RID-X’s proven track record and ease of use make it a top choice for homeowners seeking reliable septic maintenance. Regular use ensures optimal system health and longevity.

Cost and Value Analysis

RID-X offers a cost-effective solution for septic system maintenance. Priced affordably, it provides long-term savings by reducing the need for frequent pumping and preventing costly backups. Its ease of use and effectiveness make it a valuable investment for homeowners. Compared to other brands, RID-X strikes a balance between quality and affordability, ensuring optimal performance without overspending. Regular use enhances system longevity, making it a budget-friendly choice for maintaining a healthy septic system over time.

Frequently Asked Questions

Common questions include how often RID-X should be used, its safety for plumbing systems, and effectiveness. Always refer to the product label for specific guidance and precautions.

How Often Should RID-X Be Used?

RID-X should be used once a month to maintain optimal septic system health. For tanks up to 1,500 gallons, pour 8 ounces down the drain or toilet. Regular use prevents backups and prolongs system life. Adjust dosage for larger tanks or heavy use, following package instructions closely. Consistency ensures beneficial bacteria levels stay balanced, promoting efficient waste breakdown and system longevity. Always flush thoroughly after application for proper distribution.

Is RID-X Safe for All Plumbing Systems?

RID-X is generally safe for most plumbing systems when used as directed. Its natural bacteria and enzymes are gentle on pipes and tanks. However, overuse can disrupt septic balance and harm the environment. Always follow dosage instructions to avoid potential risks. Compatible with both home and RV systems, RID-X supports septic health without harsh chemicals. Proper usage ensures safety and effectiveness, maintaining system integrity and preventing backups. Regular monitoring is recommended to maintain optimal performance and environmental safety.

RID-X effectively maintains septic systems by breaking down waste and restoring bacterial balance. Regular use prevents backups and prolongs system life, ensuring efficient and safe operation.

Final Thoughts on RID-X Instructions

Properly following RID-X instructions is essential for maintaining a healthy septic system. Regular use helps break down waste, restore bacterial balance, and prevent costly backups. Always adhere to dosage guidelines and application methods to ensure effectiveness and safety. By incorporating RID-X into your maintenance routine, you can extend the life of your septic system and avoid potential environmental risks. Remember, consistency and careful adherence to instructions are key to optimal results and long-term system health.